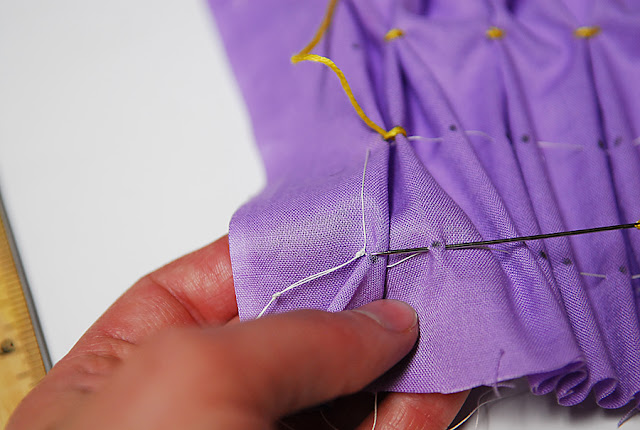
I love fabric manipulation. There are millions of ways to manipulate fabric. One of the ways is smocking. So for Sewing 101 we will do Smocking 101. Nothing fancy here, no machines, no fancy tools. All you need is a ruler, pencil, thread and needle. (and fabric of course) I will be showing you 2 types of smocking stitches. The honeycomb and the Wave.
Start with the fabric you will be smocking. You would smock fabric before you construct the garment. If you are making a pattern that you want to smock you want to make it 2 1/2 to 3 times wider than needed since smocking will bring it in.You can smock any fabric but a light weight and slightly stiff fabric works best.
Then with a ruler you are going to draw dots on the fabric. You want the line of dots to line up with the grain of the fabric (the threads in the fabric are the grain) I made mine all one inch apart sideways and down. You will be making a grid. I numbered the dots for you to see so when I walk you through the stitching you can follow the dots. It's 1, 2, then below 2 is 3, 4, above 4 is 5, 6... etc..
You can make as many dots as you like and have them closer of further away.
We will start by gathering up the rows of dots. Get some thread and a needle. Tie a knot in the end of the long thread. Then with the needle start by taking a small stitch under the first dot.
Then move on to the next dot and make another small stitch under the next dot.
Then leave a long thread at the end of the row. Continue sewing rows the same way until all the rows are stitched.
Then start by gathering up two rows. The dots will then be at the top of all the gathers. I numbered them again for you so you will know which dot I am talking about. Secure the gather. I wrap it around the pin to secure.
Then for your decorative stitches I use embroidery floss. Thread your needle. Then start by coming up through hole number one.
Then move over to hole number make a small stitch under hole 2 then another small stitch under hole 1. You can see the needle goes through hole two and hole one under where the thread is coming out.
Then pull it tight. Next with the thread on the back come up through the hole number 3 (right below hole number 2) You will them repeat the steps.
Small stitch through hole number 4 (right next to hole number 3) then small stitch through hole number 3. Pull tight and then come up through hole number 5 (right above number 4 and next to number 2)
Keep repeating until you get done with all the holes. Then Just tie off the thread on the back side. That is the honey comb stitch. Not bad right? When you get it tied off then you just want to cut and remove the thread you used to gather with. (the white thread in this case)
The next stitch is called the wave. You want to start by gathering the two rows just like we did before and securing them in place. This time shown by creating a knot. It works the same to secure as the pin although there isn't a pin in the way so do whatever works best for you.
Then start by coming up through hole 1 and then making a small stitch through hole 2. Just like before only there will not be a small stitch through hole 1 again.
simply pull it tight. Then with the thread on the front you will make a small stitch through hole 3. See how the needle goes in on the right of the hole and out on the left. You have to do all the stitches that way. Or you will have an error. (like I do in the next step since I wasn't paying attention ha!)
Next you will make a small stitch through hole 4. Then pull tight. (see right to left needle, that is right)
Next move up to hole 5 make a small stitch. (this is where I wasn't paying enough attention and I went left to right... that is wrong) You will continue making small stitches gathering the two holes and then moving down or up (depending on where you begin)
Then you have a wave and the thread is all exposed. It is used to add a decorative detail. (just never mind the error from my misstep)
Press if you like and there you have some smocking. Great for bodices, yokes, sleeves, pockets. You name it you can do it.
So go ahead and give smocking a try!


No comments:
Post a Comment