So it's that time of year again. The time of year that the weather turns from cold and wet to warm and sunny, hence it is time to go through the closets and pack away the out grown winter clothing to prepare for warm welcoming comfy summer clothing. My favorite? Leggings. Knit fabric is great, it's stretchy and comfy and can be found nearly anywhere. (just take a peek in your closet) I sew with it pretty often but the thing that can be the hardest when sewing with knits would be the hemming. So how about some super quick hem free, elastic free leggings that are super comfy and easy for Summer.
They are perfect for making
last year dresses, into
this years tunic. So do you want to make your own? They are so easy you won't be able to stop.
Start with a pair of leggings as your guide. Cut the legs out on the fold. I also cut them shorter than the top of the waist since we will add a nice wide waist band. (let's pretend I wasn't shaking like crazy making for such a blurry picture...geez, hold still much?)
So here is what you will want:
2 Leg pieces cut on the fold (along the straight edge)
1 Waistband. Measure the waist subtract 2 inches and cut out a waistband that is that width and as tall as you would like. (mine was 5 inches)
2 cuff pieces. Measure the ankle. Subtract 1 inch. Cut that width and any height you want, mine was 5 inches (like the waist)
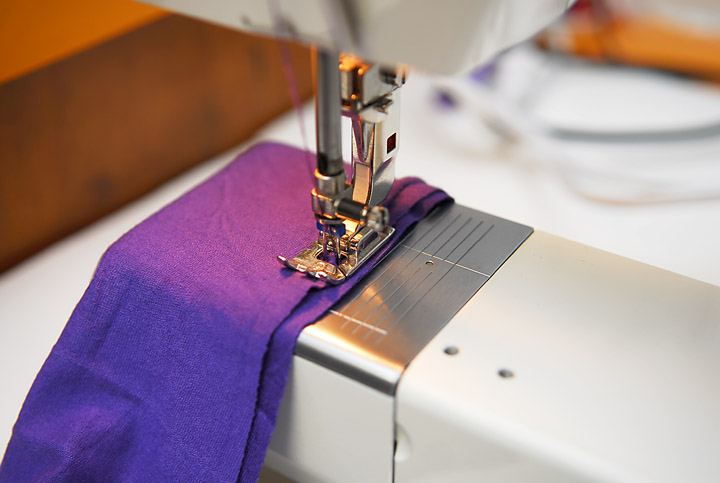
Now for the sewing. I like to use a double needle when sewing with knits. The double needle allows for the fabric to stretch which is good for knits. The other key to sewing with knits id to practice on a scrap of fabric adjusting your tension, and stitch length until you find the combination that allows the fabric to flow through nice and smooth without pulling or gathering. For this knit (a rayon lycra blend) I used a stitch length of 3 and I set my tension to 4. (I use a Bernina 1008)
See how the double needle sews two little rows. It's like have a reinforced seam.
So you will sew right sides together sewing from the bottom of the leg up to the crotch. Then turn one leg right side out.
Put the right side out leg in the inside out leg. Match up the middle seams together and the raw edges. Then sew the "U" shape that sews the two legs together. (you may also notice that I serge my edges, you don't have to with knits since they don't fray, but I like the added security.)
Now you have a pretty basic pair of leggings, we will finish them up with the waist band and cuffs. (they are all sewn the same way)
Fold the waist band in half width wise, and sew along the edge. (this will create a tube)
Then fold the waistband in half length wise so the seam you just stitched will be on the inside. Then use the seam to be the middle back, and with a pin mark the middle front and two sides.
Then with right sides together match up the raw edge of the waist to the raw edges of the waistband. Match up the middle back and front with the seams in the front and back and then match up the sides with each other. The waist band may very well be smaller than the waist, that is fine.
As you sew the waist band and waist together stretch the waist band to fit the waist. Sew as you stretch.
Follow the same steps for the cuffs of the pants. Then you are done. No messing with hems, or elastic, they are done and comfy, and perhaps I would like a pair myself...
Chic and cute and perfect for throwing on to play with in the sun.
We welcome the warm weather, we are really hoping there won't be any more cold days.
Other details:
Dress made:
HEREShoes from
HERE


No comments:
Post a Comment