
I have two kids. I love them dearly. When I was expecting my daughter I was so happy that Jude would have a little buddy. I always felt he would have been the perfect 2nd child since he has always wanted a buddy. Then Abbey came along, and frankly I was sure he hated her. He would ask me when she would leave. She never did. I thought when she got a little older and more mobile they would become the best of friends. Nope didn't happen I just had to break up more fights. I thought as she could walk and run and play games, Jude would develop a friendship with her. Nope. I still spent a large part of my day breaking up fights and wiping tears, and taking toys away. However over the past few months they have really become friends. Maybe because Jude goes away to preschool? I really don't know how it happened, I just know that I finally hear laughter and creative playing together, instead of tears and fighting. Abbey announced today that Jude is her best friend. It melts my heart and I just really hope it continues and that Jude is a stellar big brother. This inspired a little matching ensemble for them.

I love vests for boys, but they are also great for girls with a few modifications. So I thought I would start today with the girls vest and tomorrow will be the boys vest, I am working on getting the pattern I used for Jude's vest uploaded for a free download for tomorrow as well.
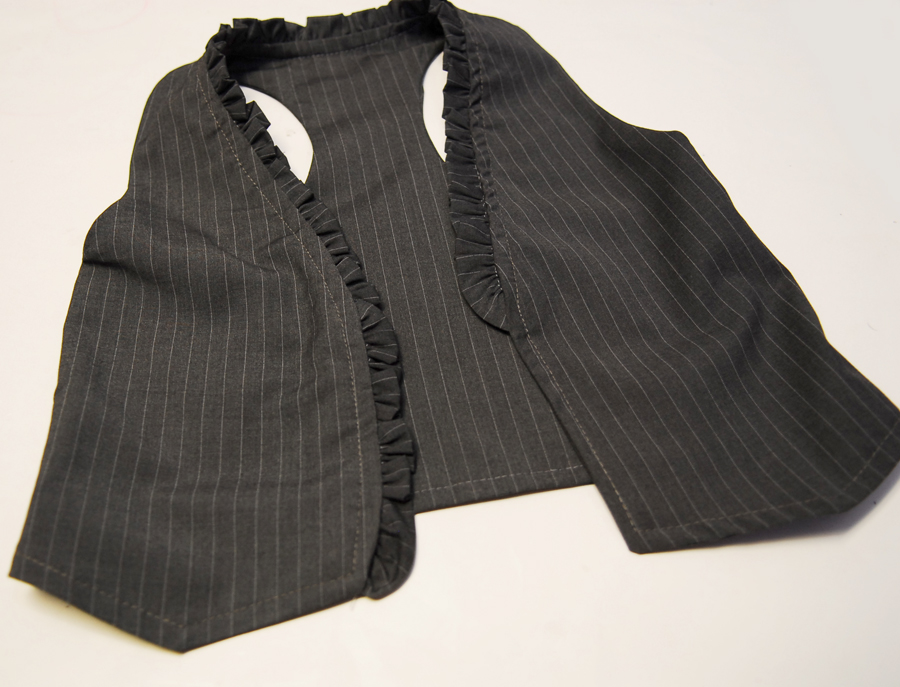
The girls vest is basically a basic vest shape with a few changes it becomes very feminine, like a ruffled front, flower decoration, and a racer back. SO let's get started...
making a vest pattern is pretty easy. I use a basic top drafted pattern (need help with drafting
check here) I change a few things.
I lower the arm opening by about an inch. Then I cut one on the fold for the back. To make it a racer back I cut the curve in deeper for the arm curve.
For the front I cut two not on the fold with the front angle, and I add a diamond cut to the bottom. 3 pieces that it. I cut out two sets one for the lining and one for the outer.
Then sew the front and back pieces right sides together at the shoulders. Do this for the outer pieces and the lining.
Then to add a ruffle I cut a long strip and folded it in half. Then I ruffled it along the raw edge. Pin it in place on the right side of the vest. If you need ruffle help
check here. I didn't have the ruffle go all the way down the right hand side since when it is buttoned it would be the under side.
Then with the right sides together put the vest lining down sandwiching the ruffle in between the two layers. Sew along the white lines. Then turn the vest right side out.
Then you will want to sew the sides right sides together and hem the bottom edge by turning under the two pieces so they are turned inward. Top stitch along the edges. Then your vest is nearly done. Just have to add buttons and button holes.
I also added a very simple flower. To make it I used silk to cut 6 circles, then following the steps above I folded the circle and then I used my lighter to singe the edges. Then sew them in a circular shape on the vest. Sew them by only going through the tip of the folded circle. Then I did the same thing with a second layer, using a white chiffon, and I used 4 smaller circles. Then the last layer was 3 smaller circles cut from lace, and I topped it with a few pearls.
That's all there is to it. I cute and girly vest.
I love the sweet ruffle around the front and neck.
And the racer back is just too cute.
See you back here tomorrow with the little dude's vest.


No comments:
Post a Comment