
My kids like to watch the same show over and over and over and over again. It may seem crazy but I really don't mind. I remember watching Harry and the Hendersons a million times over when I was younger, and so I feel like it is a right of passage being able to watch something over and over. Most the time I just tune it out but for about a month straight it was Mickey Mouse one particular episode. They float in bubbles and they sing a rather catchy (catchy like it's a small world, or the flu) song... "There's no trouble in a bubble when your floating along"... and so forth. So why I am telling you this since I am sure it is nothing more than rambling at this point. Well the entire time I was making the bubble skirted top I could not stop sining the song. Which is where the name came from.

You see the top combines a few of my favorite things (another great song I wish I had that stuck in my head instead) A simple fitted bodice, buttons, bubble hem, and eyelet fabric. The fabric even kind of reminded me of bubbles. The top is simple, so easy to mix up a bit and so light and easy for summer especially paired with the leggings from the other day this makes top number 2! So would you like to make your own? Let's get started!
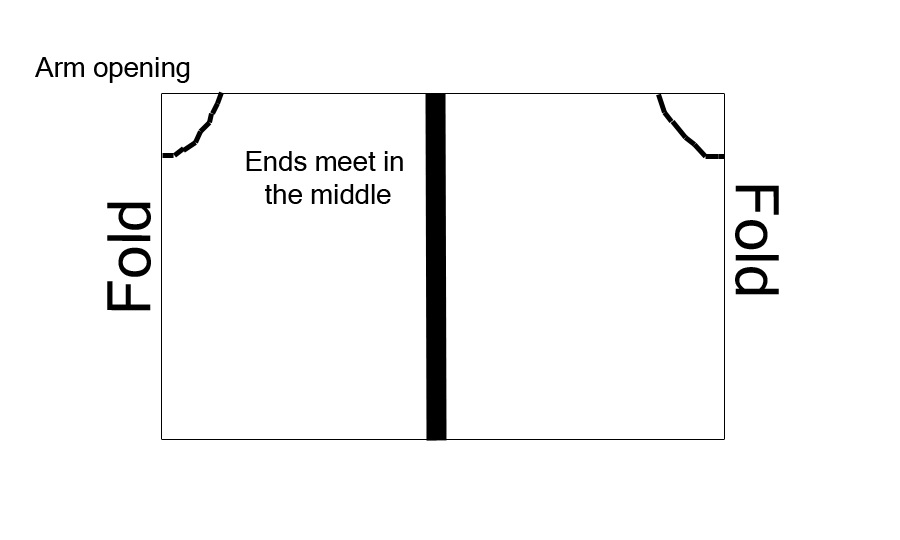
I even made a little diagram to show you a few of the steps since it would be a tad easier. So begin with deciding how tall you want your bodice piece to be. Think from the neckline to where you would like it to end. Then measure around the widest part of the chest. Add one inch to that measurement and you have the measurements for your bodice rectangle. Then lay it out flat and fold it as shown above so the ends meet in the middle. On both sides where the fold is cut in a curve for the arm pit.

Then when you lay it out flat it should look like this. Cut 2 of them I cut one out of the eyelet and one out of white jersey knit to line with. You will also want to cut out a button flap, to do that make a rectangle the same height as the bodice and about 2.5 inches wide. (you will fold that in half)
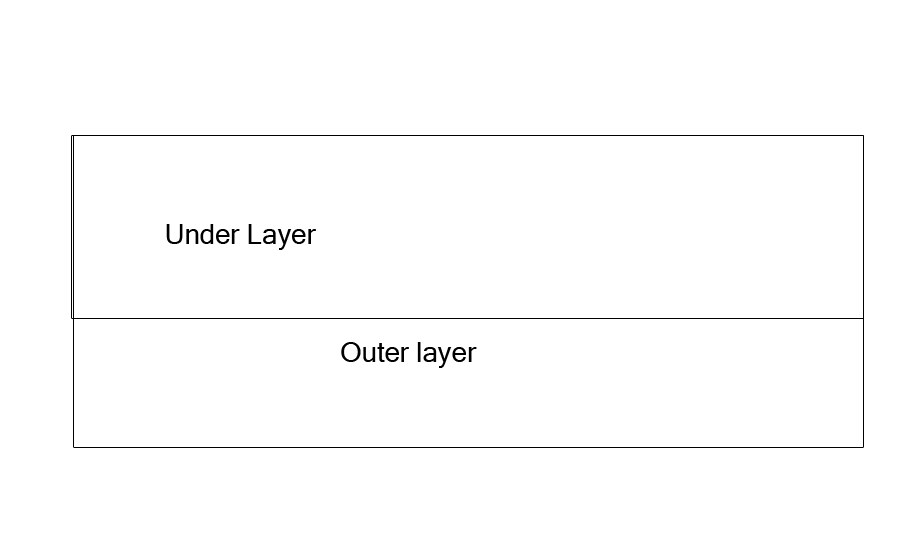
Next let's make the skirt part. You will cut two layers the under layer will be shorter than the outer layer as shown in the diagram. I made both the same width for this skirt. The width should be 1.5 times longer than the width of the bodice piece. (longer if you want a tighter gather)

Then start by sewing the lining to the outer piece along what will be the bottom edge in case you are using a directional print. (so looking at the picture as is right now you are seeing the right side of the eyelet upside down, but for my fabric it didn't matter)

Then lay the pieces flat and with right sides together fold the skirt piece in half. sew along the side.

Then fold the seam you just sewed to the inside and line up the lining piece with the outer piece along the top edge. (you will see the bubble hem forming) Then run a basting stitch along the top edge and pull to gather.

Next you are going to sew the bodice pieces together with right sides together sew the outer piece to the lining piece and sandwich the folded button flap between the one side, just line up the raw edge. (so the fold of the button flap is towards the inside) Then turn it right side out.

Next with right sides together sew the bodice piece around the skirt piece have the button flap overlap in back.

Then you should really see the top coming together.

Sew some button holes on the flap add some buttons to the bodice piece and add some straps and you are done!

You have a sweet little bubble top with buttons down the back. The top has a lot of movement for spontaneous dance parties in the middle of the afternoon since it is raining outside...

Or the perfect top for looking out the window and dreaming of floating away in a bubble, after all there is no trouble in a bubble :)
Enjoy!
No comments:
Post a Comment