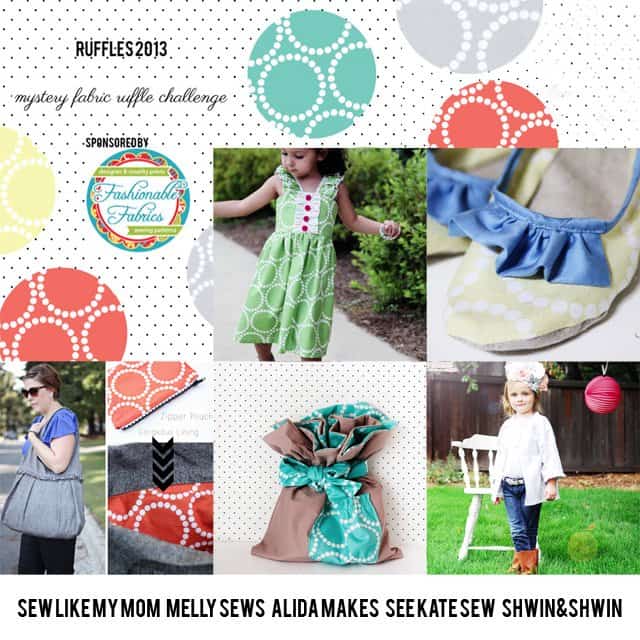
The fabulously talented Kate from See Kate Sew is doing another ruffle event. Ruffles 2013, and we got to participate! The challenge?
Fashionable Fabrics sent us a "
mystery fabric" to sew up however we wanted as long as we included a ruffle. I was so in love with the
Pearl Bracelet in Hiho Silver. When I was thinking about the challenge, I had glanced over at the
Aspen Ruffle Dress that I had all cut out and ready to sew. I thought how perfect would it be to re-mix a pattern by
See Kate Sew for See Kate Sew?
I went a little modest with the ruffle. I am not an over the top ruffler, I like a modern clean ruffle. Abbey is getting really into over the top girly stuff so I am sure more ruffles are in the future but for now I stuck with a simple cute little ruffle added to the sleeve. The neckline still gathers with the tie which also adds to the ruffle effect.
The outcome was a ruffled duster (long thin light jacket) I simply love it. The
Aspen Ruffle Dress was perfection to turn into the jacket and super easy to make the changes to. Here is how:
First, I wanted a cropped wrist length, so I chopped several inches off the sleeve length of the
pattern. Then I added a ruffle to the sleeve edge by cutting a strip that was 2 inches wide and 2.5X the width of the sleeve edge. Then I folded the strip in half length wise and gathered along the raw edge. With right sides together I stitched the ruffle to the sleeve edge.
Then I pressed the ruffle out flat and top stitched along the seam.
I assembled the bodice and sleeves following
the pattern and then I cut the front down the middle so it would split for the jacket. Before starting on the neckline I hemmed the front edges so they would be finished. Then as
the pattern instructs I finished the neckline with the bias tape only I folded over the edges at the front. (I also cut my own bias strip hence no fold lines)
Then just as
the pattern has you do I made a casing only instead of elastic I slipped ribbon into the casing to tie along the front.
The other change I made was I added pockets. Which is super easy. I cut out 2 large D shapes for each pocket. Then for one D pocket piece I placed it face down to the front piece of the jacket and then I cut out a smaller curve for the pocket opening. Then sew along the curve and clip the curve.
Press the pocket piece to the back side. Top stitch along the curve.
Next place an uncut D shape pocket piece right sides together with the pocket facing. Sewing only through the pocket pieces sew along the outside curve.
Then with the front and back together sew up the sleeve and down the side. Repeat with the other side so you have two pockets.
Lastly just as a side note, Abbey wanted a crown (girly stuff I am telling ya) I have been wanting to make a flower crown for awhile so we did for the occasion. I don't have a full tutorial for it, but I used my silhouette cutter to cut out some 3D flowers that I had purchased from the design store. Then I cut out a few different styles with different papers and textures.
I cut out a crown shape from some card stock and then attached the flowers to the crown using some brads they went through the flowers and the crown. Super easy and made a little girls dream come true.
I simply love
See Kate Sew patterns they fit perfectly, and they are so easy to use, even in a re-mix.
I am in love with the ruffled duster and the
Pearl Bracelet Fabric, which works really well with the round cut out pocket which mimics the shape.
We also had a blast with a girly photo shoot, which I am pretty sure a ruffle even calls for an over the top girly photo shoot right?
Thanks to
Fashionable Fabrics for the amazing Fabric (you should check out all the amazing fabric they have!) and thanks to
Kate for the fun ruffle filled event! (and the
amazing pattern)
Check out the other mystery fabric guests they all made some pretty awesome stuff!


No comments:
Post a Comment