Saturday, December 8, 2012

Jacaranda Designs Giveaway {$30 dollar gift card}

We have a great giveaway for you today! (and have you entered to win the $20 gift card giveaway from yesterday?) 
Jacaranda Designs is one of my favorite shops! I love all of her jewelry, and there are TONS of options! Her shop is loaded with goodness! Today she is offering one lucky winner a $30 dollar gift certificate to her shop! Just in time for last min. holiday shopping! Perhaps for that someone special on your list, or yourself :) (I won't tell) So let's shop shall we?

 You will find Loads of gifts for every budget! Starting $10 and under:
Burgundy Rose Ring
Vintage Brass Bookmark
Mauve and Pink Hair Pins
Pink Rose Ring

 Tons for $20 and under:
Purple Cameo Necklace
Red Crystal Earrings
Tangerine Orange Earrings
Acorn Earrings

And Tons more even for $50 and under:
Bow Earrings
Crystal Heart Necklace
Blue Crystal Bracelet
Vintage Orange beaded Necklace

Overwhelmed with all the beauty? Me too!
If you want to enter to win a $30 gift certificate to Jacaranda Designs

Leave a comment on this post telling me who you are shopping for this holiday season.

Want some extra entries?
Show Jacaranda Designs some love!

Follow her on facebook and leave some love (leave a comment here that you did so)

Pin something you love from her shop (leave a comment here that you did so)

Share the giveaway on facebook (leave a comment that you did so)

You can have up to 4 comments (for 4 entries)
Please leave your email address if its not linked so I can contact you if you win!
Giveaway ends December 14th (11:59 MST)
Winner will be selected on the 15th

Good Luck!

Friday, December 7, 2012

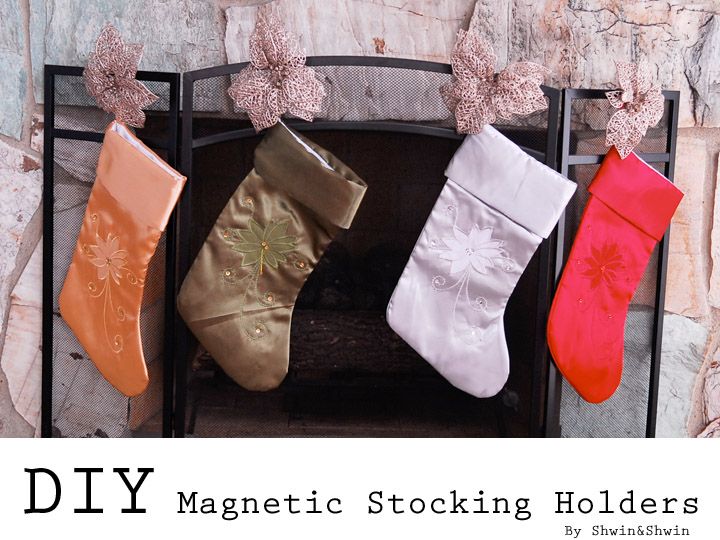
DIY Magnetic Stocking Holders {decorating with the Dollar General}

This post brought to you by Dollar General. All opinions are 100% mine.

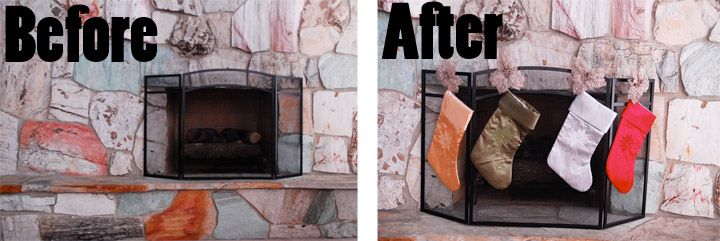
I love decorating for Christmas! Hanging up all the decor, decorating the tree, and having that holiday aroma from the scented pinecones. It's heavenly. However I have always had one problem. I love our fireplace, but we don't have a mantel... so sad. Mantles serve one purpose for me, hanging stockings. We have actually never had a mantel since we have been married, we are moving in the right direction now that we at least have a fireplace, but I needed a solution for hanging my stockings. So I was excited to team up with Dollar General Holiday décor they challenged me to decorate for the holidays using their Holiday Decor section. I knew I first wanted to solve my problem so like any good DIY-er, I was hunting for a solution.

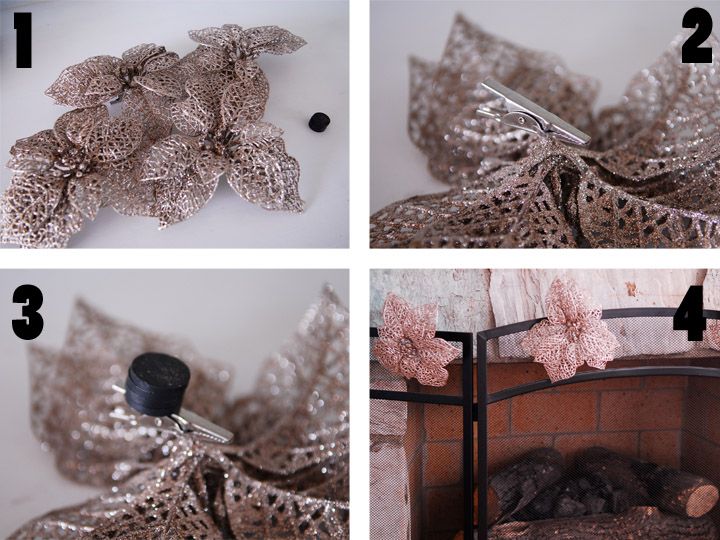
I found these great ornaments that had clips on the back, and I knew they would be perfect. I also got some magnets. Then I went to work. I used hot glue and glued the magnets to the back. I stacked a few so they ornament wouldn't be right up against the metal screen. Then since our Fireplace screen is metal (as most are) the magnets stuck right to the metal. I used the clips to hold the stockings. No damage, just remove the magnets when Christmas is over. 

And now I have a happy fireplace with the stockings all hung just where they should be, even without a mantel. 

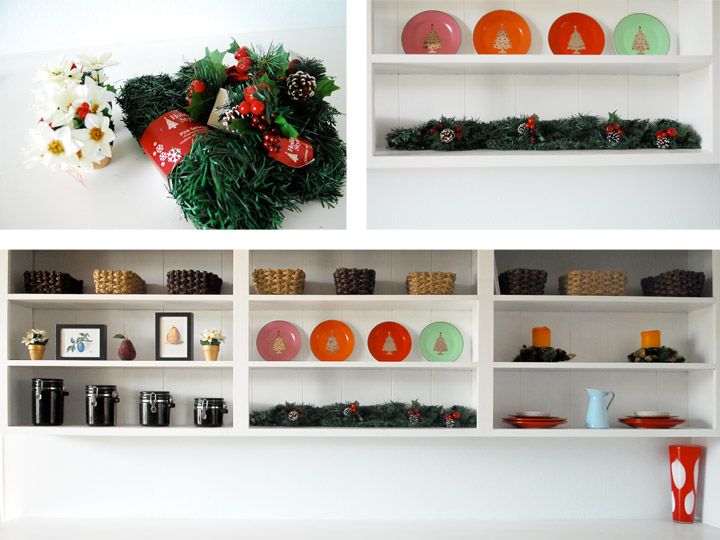
I also had the pleasure of shopping for some general decoration, which is good since our dining room shelves needed a little help in the holiday department. I picked up some garlands, decorations, and plotted flowers to get the job done. I added the garland for some nice greenery and stuck the decorations in it. Then I simply added the potted plants and the shelf was all decked for the holidays. 

I loved shopping at the Dollar General since I knew I was getting a good deal, and they had a great selection, from ornaments, to wrapping, to trees, and garlands. They had everything you could need for your holiday decor. 

Check out The Dollar General on Facebook for more great ideas!

And good news! The Dollar General has given me a $20 gift card giveaway to one lucky winner!

Entering the giveaway is easy simply leave a comment about what holiday memories the Dollar General can help you create. 

That's it one comment, one entry. 

The giveaway will be quick to be sure and get you the gift card before the Holidays. 

(U.S. only sorry to all of our international fans) 

Giveaway ends December 13th (11:59 MST)

Winner will be emailed so please be sure to leave your email address if it is not linked to your name winner will have 24 hours to respond, or a new winner will be selected. 

Good Luck!

Visit Sponsor's Site

Instagram Friday!

Welcome to this weeks link party!
(no baby yet...hopefully soon :) We did have a busy week, nothing quite like the fear of the baby coming any day to get all the things done that you have been meaning to do for awhile...
 We started Advent. I love advent, and my mom sent me the advent calendar from when we were kids. It's fun to share something from my childhood with my kids.

 We have had many rainy nights, which is odd for December, but rain still makes for a cozy evening.
 The biggest project this week was getting new carpet in the basement. I love new carpet! The new carpet was part of the delay in other projects, we had to wait till the new carpet was in before we could move Jude downstairs, and then we moved Abbey to Jude's room, and set up the baby's room in Abbey's old room. Whew, it was quite a switch up. (and no it didn't put me into labor as I had hoped it might :) Jude's room is the only one that is nearly complete. It's the old playroom, minus the butterflies and with a new (but old) dresser which I love, it used to be my husbands, sad thing, it's missing one knob... one, and I love the old knobs, so now I am on the hunt to some how find one knob to replace it...
We also had a special surprise visitor (well surprise for the kids we knew he was coming) Our church sends a Santa around to visit all the kids. It helps with the behavior, Jude loved it, Abbey was a little unsure, even though she says she loves Santa.

So that was our week, how was your week?

Thursday, December 6, 2012

Neighbor Gift DIY Gold Cookie Plate {Holiday gift guide}

It's that time of year, the giving of gifts, thinking of others, and all that goodness. Every year the hardest part for me is thinking of the neighbor gifts. We have some of the best neighbors, they are older, they love our kids and they put up with all the noise and craziness that often comes from our house. One even entertains our children on a regular basis for several hours a day. (she is amazing) So even this year with all the craziness going on I knew we had to do our neighbor gifts to thank our dear sweet neighbors, but this same idea could be used to give a gift to anyone you like, or add to your holiday decor, whatever you like it's really easy and I love the way it turned out. 
You need 2 things really, a ceramic plate and a Sharpie marker (permanent marker)They recently came out with gold, and I thought it was perfect for this project. I got my plates from the dollar store. (I also like cheap :) Wash the plates. Then I used my Silhouette to cut out a reindeer out of vinyl but you could go free hand, or use any sticker. I just cut it out and stuck it on. Then I colored all around the sticker. Then peel off the sticker. Bake the plate in the oven at 350 degrees for 30 min. This makes the design baked on and should be dishwasher safe, although I have only ever hand washed the plates. Then top with cookies and deliver to your neighbors, they get a yummy treat and a new Christmas plate.

Looking for other gift ideas? I had fun putting together my annual Holiday Gift Guide with ideas for almost anyone on your list:

The Sewing lover:
1: Bukhara Orange Stencil Floral
2: Bukhara Multi Fez Yardage
3:Bukhara Multi Henna Yardage
4: Small Cheveron Rolie Polie
5: Basic Grey Notations Polished Blossom Linen in Blush
6:Basic Grey Notations Delicate Blossom Seaspray in Bloom
7:Small Basic Dots Charm Pack
8:Blue Cool Cords
9: Notting hill Aquamarine
10:Bermuda Chevron


For the girls:
1:Ballerina Kitty Sewing Pattern
2:Baby Blanket Lovey with custom embroidery
3:Fairy Fun
4:Kitty Bowling Set
5:Mini Frida Doll Sewing Pattern
6:Barefoot Roses Dress


For the boys:
1: Personalized Helicopter Toy
2:Space Hero Capes
3:Baby Boy Quilt with custom embroidery
4: Captain America Hooded Tee

For Men and Women:
1: How I met your mother cufflinks for Him
2: Bird Nest Necklace
3: Men's Abstract Art Watch
4: Chevron Clutch with Chain

Wednesday, December 5, 2012

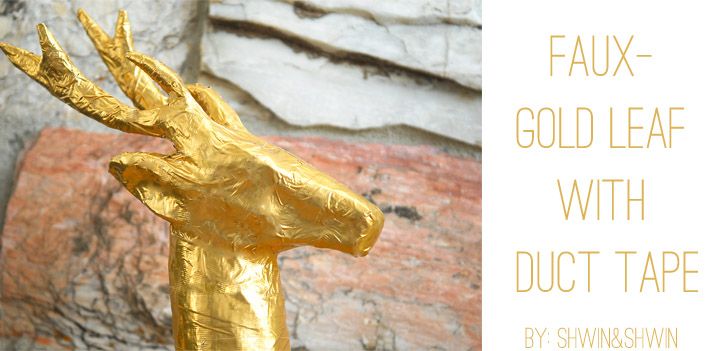
Faux Gold Leaf with Duck Tape® {How-To}

This post brought to you by Duck Brand®. All opinions are 100% mine.

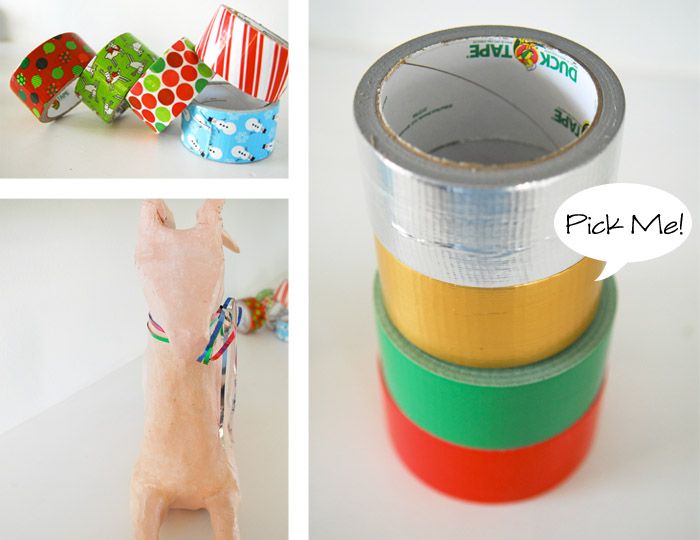
I recently teamed up with Duck® Brand and their Duck® the halls challenge. They sent me a box loaded with Duck Tape®  and the challenge was to use it in a creative way. 

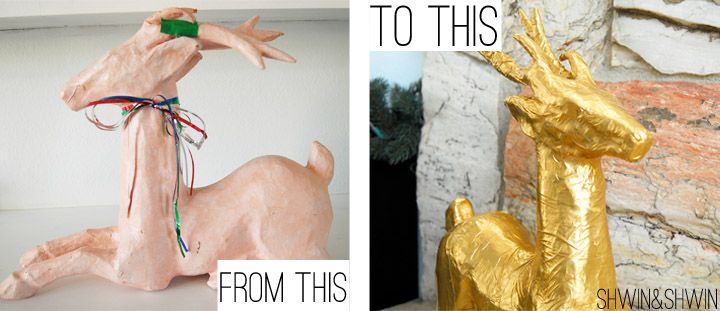
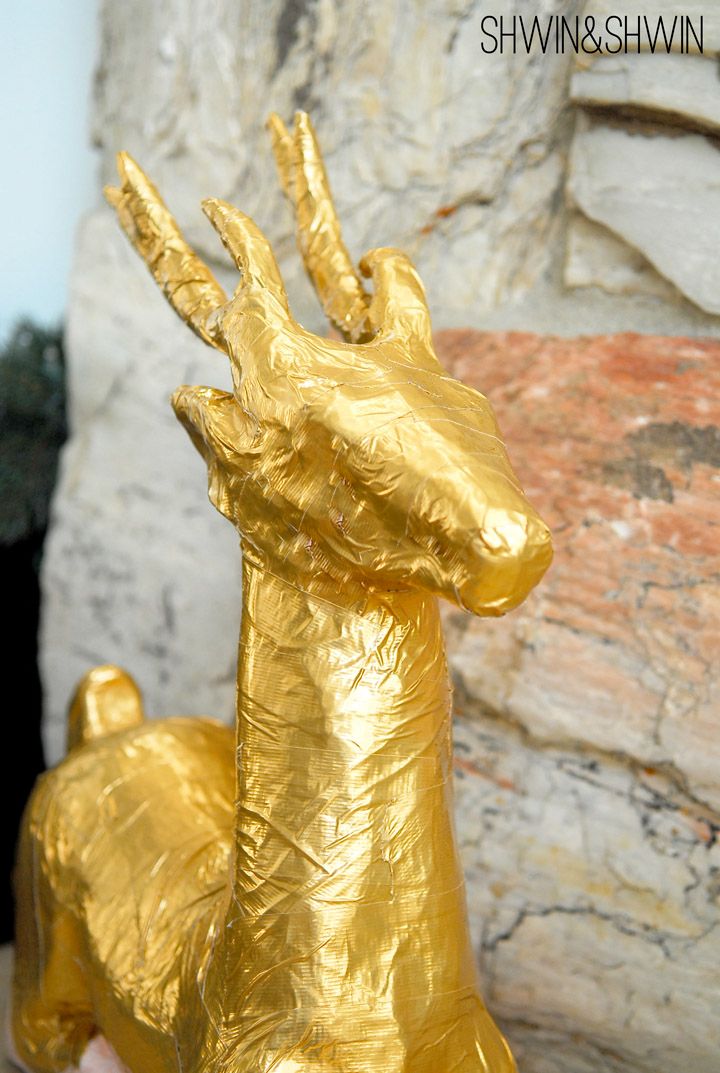
Enter the white elephant gift we were so lucky to recieve last year... (yes last year I liked it enough to hold on to it :) My Husband loved this little guy, he thought it was awesome and he knew we could turn it into something great. However a year went by, and we couldn't quite figure out what we wanted to do with the Paper Mache deer. (with broken antler) 

Then I got the box full of goodies from Duck® Brand and even though they have tons of fun prints, bright colors and darling tape... the shiny Gold was calling out to me. I looked at the gold, I looked at the deer and I realized it was fate. The tape would not only fix his poor broken antler but it would look like it was gold leafed... only much cheaper :)

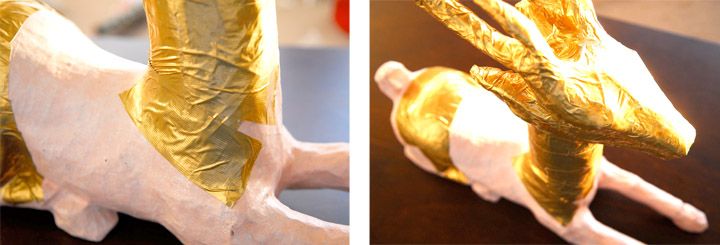
Then simply tearing off small pieces of Duck® Brand gold tape I smoothed it onto the deer. I wrapped carefully around the antlers and used the tape to secure the antler and of course make him gold and shiny. In about an hour I was done with the whole thing. 

Then the little deer that was once sad and pink and sponge painted was gold and shiny and a perfect addition for our Christmas decor. I love how easy it was to do and I think you could easily use Duck® Brand gold tape to make any object look like it has gold leaf on it.  I can't wait to use the other more colorful tape to add some fun wrapping to all the boxes I am sending out to family this holiday season. They are great and what a fun way to make a boring brown box look cute!

I highly reccomend checking out Duck® Brand Tape and

Visit Duck® Brand on Facebook and "like" their page for more great crafting ideas!

Visit Sponsor's Site

Tuesday, December 4, 2012

Link Party #45

This week's link party is here! Also known as my favorite time of the week! You guys are busy creating fun stuff that is adding to my already out of control to-do list... but it's amazing! Here are my favorites from last week...

Frances Suzanne shared their version of the Lizzy Dress Pattern, when they were testers for me. I absolutely love what these girls produce and their Lizzy is just darling and classic. Love it!

A little Gray who has some seriously mad quilting skills shared these place mats (and the free pattern :) I so love them, I wish I had the time to whip them up right now (and the skill of course) Maybe my kids will grinch mats for a Christmas in July :) 


Untrendy Life shared this baby swaddler. I may just have to put this at the top of the list... it's awesome, and I love it.


So let's see what you have been up to this week!
New to link parties? That's totally fine here's what you have to do:

Find a entry on your blog that you want to link up.
It can be ANYTHING (unless it's an ad or something let's keep it spam free)
Say it is a great new project you just made and have been dying to share it with the crafting world. 
the link should look something like this:
http://(your blog adress/website)/(the post you want to link).html
Linking to the post is the easiest way for people to get back to that post.

Then click where it says "click here to enter" 
follow the steps to link your post and create a title, and select your picture.
Keep in mind the picture will be small thumbnail so pick a picture that shows it off the best. 

Lastly if you were so kind to add our button to your page or post, or where every you store your link party things that would be super cool. You don't have to use the button to link up, it's just there for you if you can't live without it. 

cool? cool. Let's get the party started!


Monday, December 3, 2012

Pajama Rama! Christmas Pajamas {Free PDF Pattern}

 Ok guys it's here! Something I have been working on for quite some time, but finally everything came together (except my two clown models who thought they were sooo funny showing off their pj's) It's the last free pattern of the year! What better than to have some Christmas Pajamas? We have been having a Pajama-Rama around here over the past 5 weeks I have made each kid 4 pairs, and still have some cut and ready to sew, (although I doubt they will be finished before the arrival of this baby)
So to share in the Joy of this holiday season, instead of just having you draft your own pattern. (which is easy to do I followed some old worn out hello kitty pajamas for mine :) I have a free pattern for you today!
The pattern is roughly a size 4T. (shown on abbey) She is long in the leg but short in the torso, and pretty lean, so I did make the pattern to fit her, but I would say it is pretty spot on with a 4T. For Jude who wears a 6, I just lengthened everything, made the legs longer and then torso longer and the sleeves longer. They are wearing the same width, so adjusting the pattern should be pretty easy for you. 


Instructions to sew the top are below
(you may recall when I shared simple pajama pants awhile back, the pattern pieces include pants and you can sew them up any of the ways found in the old post) 

 Sewing the Pajama top is easy:
1. Sew front and back top pieces together at shoulders
2. Sew front and back facings together at the shoulders
3. Sew (right sides together) One collar to the neckline of the facing.
 One collar to the neckline of the bodice pieces. To do this start by matching the middle of the collar with the middle of the back and work your way out to both sides. The front will be longer than the collar.  Clip the curve of the neckline and press collars upward
4. With right sides together match up the facing and the bodice pieces sew along the edge.
5. Clip corners, and curves and cut a notch where the collar and bodice meet (careful not to cut through your stitch)


6. Turn facing to inside. Press and top stitch in place.
7. With right sides together add sleeves to arm curves. Add pleats if you use the girl sleeve, skip pleats if you use boy sleeve. 

8. With right sides together sew from sleeve edge to arm pit and then down the side. Then hem the bottom edge up by turning it in twice and sewing in place, and hem sleeve edge by turning it in twice and sewing in place. 

9. Lastly add your buttons and button holes. I actually opted for a single row, but I considered doing a double row (hence the picture)

 Now you have some sweet new Christmas Pajamas. For the ones Jude is wearing in these pictures I also added a chest pocket but simply cutting a square and sewing it on, with an added applique of the pirate ship. I also used a contrast fabric for the facing just for fun. Abbey's got a little ribbon bow at the ankle, which is hard to see in most the pictures but it was a fun little detail.
 Both kids were pleased as punch to get a stack of new pajamas. Something they normally open on Christmas eve, but this year it cam early :)
Enjoy making some cozy Pajamas!