Showing posts with label Spring Skirts. Show all posts

Thursday, July 12, 2012

Skirting the issue {reversible color block}

 You all know the fabulous gals over at Simple Simon & Co? You know the uber talented, vintage loving gals who have revolutinized Project Run & Play since they took that over as well. If you don't know them yet it's time because these girls are not only talented and amazing but they are sweet as can be and have a huge heart. They organized a whole event for the month of July called Skirting the issue. (read more about that here) They asked bloggers to share quick and easy skirt tutorials that people can make and donate to the foster care programs. So I made a two for one deal.
Fun bold and color blocked on one side...
And a cute ruffle skirt with a fun colored band on the other. It's quick and easy to make and I made a pattern guide free for the taking sizes 2T-10.
(granted I did the math with my "mush prego brain" so... hopefully it is all good to go ha! So hope on over to Simple Simon&Co and see how you can make one too!


Simple Simon and Co

Wednesday, July 4, 2012

Holiday Bubble Skirt (repost)

Happy 4th of July!
Funny story... (at least us shwins laugh but my little brother not so much...)
When were were younger our little brother (maybe 9 at the time) asked when the 4th of July was... we all kind of paused and stared at him figuring he was joking... nope he had no idea he thought it was in March because it sounded like a holiday you March to... That bright young man grew up to be a Marine for the United States of America, pretty sure he would be laughed right out of there if they knew that story. Still, on days that we come to celebrate our freedoms in this great nation, and eat yummy food and play with fire :) I am thankful that he fights to protect that right. And since I am not doing much sewing these days... or anything really I thought I would at least bring home a guest post that just so happens to be sporting the red white and blue (only in winter layers :) 

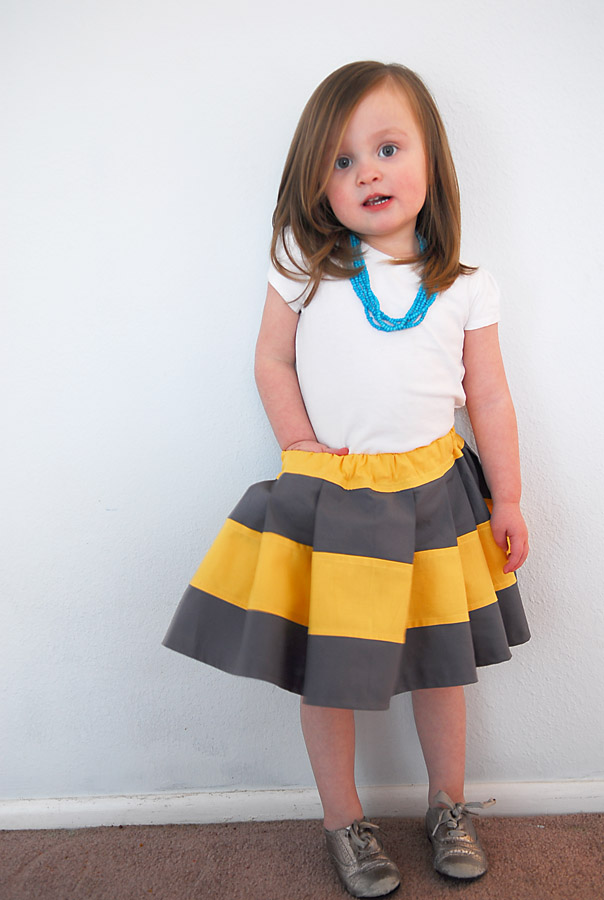
 This is a bubble skirt I made back for Sewing in No Man's Land 12 skirts of Christmas event, hence the thick tights and long sleeves. All the colors would still work great for today with the red white and blue :)
 I love the fullness of the skirt and the super wide waist band.
 The added wide ribbon around the waist adds to the festive feel of the skirt without making it a Christmas only skirt. So let's make a nice and full bubble skirt shall we?
 To start you will need some fabric for the skirt. To get the size for the rectangle measure your waist (or the waist of your little one) Then multiply it by 2.5. Then for the length determine how long you want the skirt then multiply it by 1.5.
For the next piece I used some knit fabric so it was nice and stretchy. It will be the width of the waist and half of the length of the skirt.
You will also cut out a waist band piece that you will see later.
 Start by gathering the bottom edge of the skirt.
 Then pin the inner skirt piece to the right side of the ruffled edge.
 You may have to stretch the knit as you sew it to the ruffled layer so that the layers fit together. Just let the ruffle lead as you stretch the top.
 Then gather the other end of the skirt.
 Then fold the skirt right sides together so the skirt piece and lining match up. Then sew up that side.
 Next fold the skirt so the seams are on the inside and so that the ruffled edge and the knit edge match up. You can sew them together to make it easier.
 Now for the waistband, fold your fabric length wise and cut out a front and back waistband. I made mine angled a little. (which is why it looks angled in the picture) I made two one for the front and one for the back then unfolded the pieces and sewed them up the sides.
 Then fold the waistband back and sew a straight line through the back, this will be your casing for the elastic.
 Slip in the elastic and sew it in place on both ends.

Then sew the waistband to the skirt. Sew right sides together.

There you have it, the nice and full bubble skirt is done. 
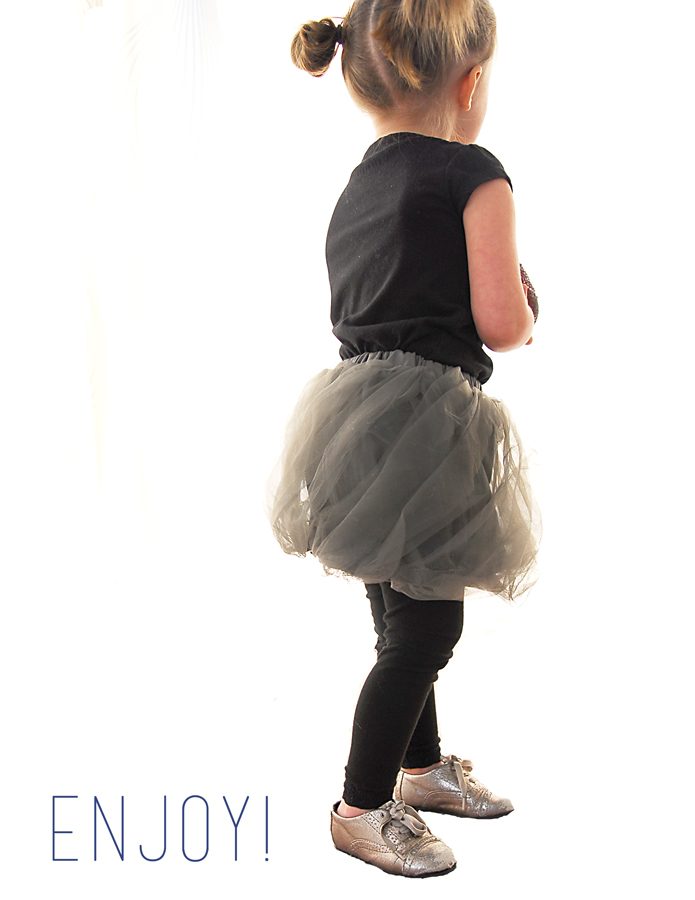
Now my daughter has the perfect little skirt to wear for the holiday season, and with a different ribbon or tie around the waist it can be worn any other time as well.

 And I love a big bow in the back. It makes me smile.
 The skirt has a lot of body and movement. Which I can't get enough of.


Have a happy 4th of July!

Monday, February 27, 2012

The "Shwin" Skirt by Ruthie Pearl

Ok as an awesome reader (yes you) you know how awesome our readers are. Well Lauren of Ruthie Pearl is no exception. When she saw this post (that happened to feature my first attempt at crocheting something since learning to knit and crochet over the summer)she saw that while I am getting into knitting and crocheting I have NO idea how to create a pattern or read on for that matter. Lauren does! Not only can she create a knit patter but they are beautiful fresh modern and amazing! (unlike so many others which is why I mainly sew) So she emailed me with a great idea to collaborate on a design for a knit skirt and she would create the pattern for it. Not only that but she offered to make one for Abbey (you know since I am still learning and I would likely have it done sometime next year :) So we had lots of fun emails where the creative and cute Lauren put together a dream skirt!
Big fat rugby stripes, pockets for treasures, buttons (since everything is better with buttons) and it is in Abbey's favorite color... purple! Although I am already dreaming it up in every color of the rainbow!

I LOVE everything about how the skirt turned out! It is so comfy and soft! The size was perfect for now and with the soft stretchy waistband she has room to grow. It would be great for the cooler spring weather with the thick tights of legging underneath or come summer even worn plain, since it is a skirt it wouldn't be overwhelmingly warm. 

I love layering is with different designs and patterns, the bold stripes add that perfect mix-matched look that kids look so dang cute wearing.
I just picked up the sweater she is wearing at a clearance sale at the GAP (my favorite place to find a bargain I LOVE their clothes)I have to say I kind of love the knit wear from head to toe. Makes me want to snuggle with her.

Funny story...So during the photo shoot, I thought we would have a little "fun" you know something other than getting dresses going in the backyard snapping pictures and then being done. So we went and picked out some balloons and we were headed to the park with the mountains in the background amateur photographer me was excited I had it all planned out in my mind. Then we got to the park... there was mud everywhere. I mean everywhere. So back home it was to the backyard, (you know because I am NOT a real photographer and the park was the only idea I had) the balloons were great anyway I love kids and balloons in pictures. Well about 10 pictures in Abbey figured out how to get the knot untied of her wrist... and just like that the balloons were gone. (a few pictures before they were gone you can see that the slip knot had slipped up so it was super loose on her wrist, something I did not notice until editing the pictures later) It was a fun idea anyway.
So If you want to see more details about the skirt from the lovely lady who designed it (and knit it) Visit her post about it here
If you want to follow a new and cute blog about knitting, life as a momma, and many other cute things follow along with Ruthie Pearl
Seriously you should check out her other patterns... they are so dang cute!

And if you are like me and dying over the "Shwin Skirt" (and the awesome name ha!) Check out the pattern for yourself!
Here on Craftsy
or
Here on Raverly


Wednesday, February 1, 2012

The Striped Skirt

 I bit the bullet recently and made a "huge" investment. I bought a self healing mat and rotary blade cutter. If you have one or have looked into them you know why I say it was a huge investment. Those things are costly. I just figured it was time and like everything else I convince my husband that I need I use it to the fullest potential so money does not go waisted. Hence a skirt I had been dreaming about for awhile was the first project I made with the new set up.
 Beautiful stripes. (yep I have a thing for stripes) I have always had some issues cutting straight and even lines, especially for straight and even stripes. The rotary cutter and straight edge ruler changed all of that for me and the striped skirt was made! Oh and this one was almost a skirt for me, but I discovered I didn't have a zipper and I wanted a fitted waist with a zipper so we will revisit this tutorial in a week or so when I do a grown up version, although you could totally make an elastic version for yourself if you rather. (whew huge long run on sentence)

So to begin select your fabric. I like using two different shades for rotating stripes but you could use the same tone in different shades for an ombre effect. I used quilters cotton (100% cotton) they have a whole rainbow of colors available most places (for around 5 dollars a yard and it's often on sale)Or you could go white and dye it yourself. Now for cutting the stripes. I made all of my 4 inches long and the width is about 30 inches. (they are folded in the picture) Then for the waistband Measure the waist. Divide it in half and then add 2 inches. So Abbey has 20 inch waist so my waist band piece was 10+2= 12 inches. Cut 2 of each stripe and the waistband so you have a front and back.
 Then with the ruler and rotary blade I just angled the ruler and cut all the stripes. This is why if they are folded they get cut the same on both sides. Make sure you do the same for the front and back strips.
 Then with right sides together sew the strips to each other bottom of one to the top of the one below it and so on.
 It's hard to see in the picture but I also pressed the seam and top stitched the seam so they would al lay flat.
 Then when you have all the stripes sewn together you will add large pleats as you pin the skirt to fit the waistband. I started by matching the middle of the skirt piece and the middle of the waistband and then added 2 inch pleats until the skirt piece fit the waistband. Then sew it together.
 Press the seam flat and topstitch. Then repeat all the sewing of the stripes and the waistband until you have a front and back skirt.
 Then with the front and back pieces right sides together sew down the sides.
 Next fold the waistband down half way. (I serged the top edge to finish the edge but you can fold it under twice if you rather)
 Sew all the way around the waist leaving a 2 inch opening then slip in some elastic. (I just put the elastic around her waist and measured what would be a comfortable fit, not too tight so she can grow a little)Sew the elastic in place to secure.  Then sew the opening closed, hem the bottom and you are done.
 Although Abbey has been so spoiled by pockets lately she was sad that I didn't put a pocket in the skirt. You could easily add an inseam pocket (find help here)
 I just love the big pleats that make it a lovely full skirt that still has clean lines.
And the stripes? Yep can't get enough...

Wednesday, January 11, 2012

Twist and Shout skirt

 Do you ever make something that you decide is an epic fail and then you shelf it? This skirt is one of those. I found this skirt I love how soft, and flowing it looks. (NOT like mine) I just thought I would try to make one with some tulle I had on hand and well tulle was too stiff. So I thought it was goofy and I put it aside.
 Then I found it while cleaning out my supplies and I let Abbey try it on. It is totally not like the one I loved, but I kind of ended up loving the fail. It is an interesting "twist" on a tutu.
 What is it actually? A twisted bubble skirt. SO it has some cute flow to it. You could make the same idea with nearly any fabric and have a cute look. So here is the tutorial.
 Start with a skirt piece for the front and back. Just make a rectangle that is the length of the skirt you desire, and the width of the Hip measurement plus 1 inch. Cut 2 one front one back.
 Then you will want to cut out the outer layer something light weight. I used tulle. I used 3 yards and just cut the 3 yard strip into the height I wanted which is about 3 inches taller than the rectangle base. so 13 inches X 3 yards for me. You could also just double the width of the base for the top layer. It's up to you. Then gather one edge.
 Sew the front and back skirt base right sides together at one side to create one long strip. Then sew the gathered edge of the tulle to the skirt base.
 Then with right sides together fold the skirt so the base sides and the tulle sides match up. Sew down the side. (this will create a tube)
 Now you put the seam on the inside and fold the tulle up so the raw edge of the skirt base and the tulle edge meet up. Gather the top edge of the tulle. Now for a normal bubble you would just match the tulle straight upward with the base.
 But instead you want to twist the raw edge so they are off from each other. Twist it over a few inches and then sew the tulle to the base along the top to secure. (I found that using a light steam with the iron helped control the tulle just be careful that you don't burn the tulle)
 Next cut out a waistband. Just cut a front and back that are the width of the skirt (plus seam allowance) Then sew them together at the sides.
 Fold the band in half width wise and sew it to the skirt. Leave an opening when you sew it so you can add in the elastic then sew the casing shut. Sorry I seem to be missing pictures of that step. If you are a visual person and need help with the waistband step check this skirt post for more details on making a waistband
 Last thing I did was a little embellishment. I cut out a long ribbon shape from felt.
 Then I pleated it, and stitched a line thought the middle to secure.
 Then you are done. With a cute little twisted bubble.
 Then again maybe everything looks cute when it is little?
Either way we are keeping it.