Tuesday, April 24, 2012

Link Party #17

It's the most fabulous time of the week! Link Party time!
Last week was full of loveliness! Since it is KCWC over at Elise Marley I was particularly thrilled to see all the kids clothing. Are you guys playing along? Naturally I spend my week sewing for kids anyway so I am so on board! 

 Skirt as Top shared the brightest most lovely burst of sunshine dress. It is simply amazing! I love the bright color and fun geometric shapes.

 Homemade by Heidi shared this adorable ensemble every detail is darling, I am in love with it all!

 Sew Country Chick made this Circle skirt dress. I LOVE the stripes, the pirate aspect, and the circle skirt (since it is a new love of mine)


New to link parties? That's totally fine here's what you have to do:

Find a entry on your blog that you want to link up.
It can be ANYTHING (unless it's an ad or something let's keep it spam free)
Say it is a great new project you just made and have been dying to share it with the crafting world. 
the link should look something like this:
http://(your blog adress/website)/(the post you want to link).html
Linking to the post is the easiest way for people to get back to that post.

Then click where it says "click here to enter" 
follow the steps to link your post and create a title, and select your picture.
Keep in mind the picture will be small thumbnail so pick a picture that shows it off the best. 

Lastly if you were so kind to add our button to your page or post, or where every you store your link party things that would be super cool. You don't have to use the button to link up, it's just there for you if you can't live without it. 

cool? cool. Let's get the party started!


Monday, April 23, 2012

The Julia Top

 So last week I had the true pleasure of getting together with Jess (from CINO) She is super fantastic and we had a great time gabbing and shopping at a craft store. I was on the hunt for a flower to put on a belt idea that had been floating around in my head for awhile and I found it! Also while talking I told Jess how I have never made a circle skirt. I know it's crazy. The closest I have ever come is when I made my tree skirt. Jess encouraged me to make one and honestly I don't know why I never did one before it was super easy and I LOVE how flouncy they are. Only issue? Abbey is not a skirt and dress lover. So I decided to make hers the skirt portion on a top.
 It can be worn with or without the oversized flower belt and it is seriously just too cute. The only thing I may change is adding another layer since it turned out a touch shorter than I had hoped for.
 Even with the shortness the circle cut allows for full twirling fun, enough to make any little girl happy.
So shall we make one?
 So start by cutting your skirt pieces. I cut 2 layers the second one was about 2 inches longer than the first. You can follow Dana's instructions on how to make a circle skirt here but I tend to eh hem... get lazy and just guess on the measurements. It is ok if the waist is too big because you will just gather it a bit.
 Next hem the bottom edge of both circle layers. Then set them aside.
 You will want a bodice front and back. I used a pattern that fit well as my guide and I had the bodice end just below the arm hole. Cut 2 for the front and 4 for the back (since there are 2 pieces)

 Then sew the front and back pieces together at the shoulders so you have two sets.
 Then with the bodice pieces right sides together sew along the neckline and shoulder curve. (follow the dotted lines)
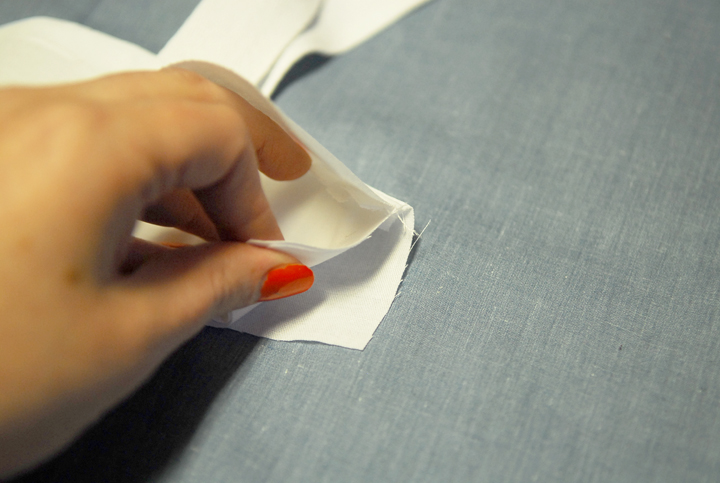
 Clip your curves and then turn the bodice right side out. Match up the back and front so they are the same width and pin the back overlap in place. (so you know where the buttons will be placed)
 Now your bodice is complete.
 If needed gather the top of both the skirt pieces. (gather them together) Then with right sides together sew the bodice to the skirt. Overlap the under arms pieces just slightly.
 Now you have a top. (or dress if you made it longer)
 Add some buttons to the back and you are done.
 Now for the belt. Find a fake flower that you like and pop it off the stem. Then take out the middle part that is usually plastic. (remove any other plastic pieces since some have more than others) Tip I used a more expensive fake flower since I wanted it to hold up well and look nice, some of the cheaper ones look cheap or they fray like crazy. You will also need ribbon (enough to tie around the waist comfortably) a button and needle and thread.
 Simply sew the button down in the middle of the flower to sew it to the ribbon. As a note for an off center flower find the center of the ribbon and then measure 4 or 5 inches off to one side and sew the flower in place there. Then you are done. The flower can be any size you want but I was really going for something huge and overstated.
 That's all there is to it!
 Tie the belt on and you are good to go.
 With a cute little tie in back. The belt can also be worn with any other outfits. Abbey actually wore it with the Hello Neutral Dress to church yesterday and it was super cute she got lots of compliments.
Either way enjoy your twirling fun! (and thanks Jess for the encouragement! Now off to put that jumbo button to good use :)


Friday, April 20, 2012

Instagram Friday {meet-ups, baking, and learning}

First a little business. The winner from the Jacaranda Designs Giveaway is:
Congratulations! You will be getting an email from me soon!

Also I am guest posting over at Ucreate today! What??? I know it is crazy I am super excited and I am sharing a super fun tee shirt project. So hop on over and check it out!


Now on to Instagram Friday!
A little Glimpse into life beyond sewing

 My husband returned from San Francisco. (yep a fun trip without me) He did however go to the best fabric store in the world took pictures to make me jealous, and then he got smart and brought me home some treasures. I am itching to sew with them but I am afraid to make something I won't like...

 We had a baking day and the kids helped make some blueberry bread. It was delish, and gone in a day.

 I got to meet up with the super Fabulous Jess (from CINO) It was so much fun to meet someone who I only knew through the blog and we got to chat and do some shopping at Hobby Lobby.

 I got Jude his first ever Silly Putty. He has been playing with it non-stop. He made some silly glasses, even though you are not supposed to have it near your eyes... opps.
 We have had some rainy cool days this week which is fine by me because it means lots of cuddles with this sweet girl.

We have also been working on Abbey's counting skills. Jude was far more interested in numbers and counting than Abbey is. He was counting to 10 by 2 and still loves his numbers and math, Abbey on the other hand, she is 3 and we are still working on counting to 10 without getting stuck (6 doesn't follow 2) so to make it a little more fun and interesting for we played several rounds of hungry hungry hippos so she would have to count her marbles. She is getting better everyday. (oh and that is the tee I share over at Ucreate)

So how was your week?

Thursday, April 19, 2012

Anchors Away Bubble Top

 I had this project. I started it awhile back and then I got half way through and decided it was a total craft fail and stashed it away. Then one night as I was laying in bed thinking through sewing projects (you all do that right?) Then it came to me. I knew how to fix the shirt, or well complete it in a way that it wasn't a craft fail. Now? I LOVE it and I am so glad I finished it.  It is the perfect summer top and so easy to make in any size you need.
 I love the cute bubble effect and since I love all things nautical for summer I love the anchor on the front. The top pairs really well with the Sail Away Pants So shall we get started?
 For the bodice measure the widest part of the chest. Divide that in half, and add 1 inch. (seam allowance and wiggle room assuming a 3/8 inch seam allowance) If you want a looser fit add 2 inches. That will be the width of the bodice piece for the front and back. The height of the pieces is up to you and how wide you want that piece to be. I also cut mine out with a bit of a sweetheart neck you can cut it however you wish. Cut two for the front and two for the back.
 Then lay some ribbon, or twill tape, so that it hangs over the top of the bodice. (these will be the shoulder ties)
 Then place the second front bodice piece on top so the ribbon is sandwiched between the two layers. Sew along the top. (follow the dotted line)
 Then clip the curve where you need.
 And you have a nice finished edge with ties.
 Do the same with the back pieces and you will have a front and back with ties.
 Now match up the side seams.
 Line up the sides so the seams match up and then sew the sides together.
 Now the top bodice is done.
 for the skirt portion cut the top to follow the line of the bodice. Then I cut it at a slight A-Line. Cut a front and back.
 Then sew the front and back together along the sides.
 Then sew the bodice to the skirt with right sides together.
 Top stitch along that seam.
 Then hem the bottom, but leave a small opening in the seam so you can slip elastic into the casing and gather the bottom of the shirt.
 Then I added a little Anchor using some flocked vinyl. More on how to do that here.
 So that's all there is to it. Super easy right? And cute so summer fun is ready to be enjoyed!
 Nothing better than a bubble top.
 And a love the simplicity of the ties at the shoulder. Cute little nautical fun.