Tuesday, May 24, 2011

Little Guy Baby Pants


 Shall we finish up the baby pants for the "go-to" baby boy gift set? Sweet! (assuming you all said yes of course) They are so easy to make no messing around with the front or back and they sew up in seconds. I even made mine out of some old pants so it saved me the time for hemming. Want to make some yourself?


 To get started I used a baby pant pattern I made for myself when my son was just a baby, then I used it when my daughter was a little baby. I made it based on a vintage pattern but I made adjustments to fit my kids to my liking. I have a paper copy for my own use but you could make a pattern by folding a pair of baby pants in half and simply tracing the leg add length at the top for an elastic casing. Then you cut it out on a fold, since you don't need a front and back slope for babies. (at least in my opinion you don't) I took some old khaki pants for this project lined the pattern up with the bottom of the hem so the fold was along the side stitch of the pant. Then when it is unfolded you should have two legs that look like the leg above. Then your pants get the detail of the side stitch and nice thick hem, without the work.
 Start by folding your legs right sides together and sewing from the bottom of the leg to the end of the curve.
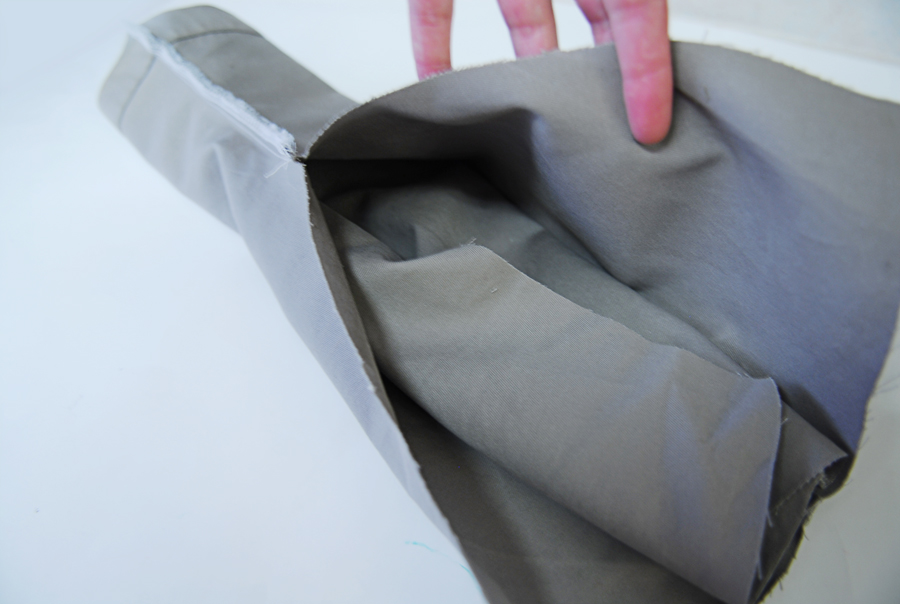
 Then with one leg right side out and one inside out put the right side out leg inside the other one. Line them up so the seams all match (the right sides should be together)
 Sew the two legs together along the "U" shape of the curve.
 Then fold the top under.
 Then fold it under again. This creates the fold for the casing.
 Starting in the middle back sew all around the bottom edge of the fold and then stop in back leaving a gap so you can slide the elastic in. Put the elastic in. I decided how much elastic based on the stretch of the elastic. I make sure that the pants can stretch to full size even with the elastic. Then sew the elastic in place and close the opening.
 Then you are done with some super easy baby pants. Unless you didn't use pants and then you may need to add a hem. For me I took advantage of the side stitches and hem of the old pants.
 Bam! Baby pants ready for a little man to be dressed in comfort and style.
That completes the little man gift set. 

Enjoy!

Monday, May 23, 2011

Get beautiful glowing skin!


So I am just going to say it, as an Esthetician I love skin, it is after all the body's largest organ. I love correcting skins imperfections and helping patients achieve a healthy radiant complexion.


Getting your skin its healthiest will make all the difference in how you look and feel about yourself. Here are some tips that I live by to keep my skin looking its best.

1- Cleanse your skin properly. Wash your face with a cleanser after you wake up. Think about it: you have been tossing and turning on a pillow covered in bacteria and hair product residue. Also wash your face before you go to bed at night. Cleanse twice; the first cleanse removes oil/makeup residue and the second cleanse to remove impurities. Remember NEVER go to bed with your make-up on.

2- Exfoliate several times a week. Exfoliating with alpha or beta-hydroxy acids or scrubs can get rid of the dull, rough outer layer of skin. While cleansing my skin before bed I use buf puf gentle facial sponge by 3M (purchase online). Once I week I exfoliate using an acid peel. (Try St. Ives Medicated Apricot Exfoliating Daily Cleansing Cloths with salicylic acid)


3- Drink at least 8 glasses (total 64oz.) of water a day. This will help clear your skin and give it a glow because it will help rid toxins from your body.

4- Protect and treat your skin with antioxidants. My #1 must have is Vitamin C . A pharmaceutical grade Vitamin C serum immediately minimizes and soothes the visible effects of environmentally damaged skin to create healthy, youthful glowing skin. Vitamin C also helps to lighten skin and improving the appearance of acne scars. Some of the best serums I have found are Image Vital C and Obagi professional Vitamin C (comes in 5,10,15 & 20%) Currently I am using the C RX system from Obagi that contains the 10% serum. You can find the best deals on serums at Ebay.com

5-Use a weekly moisturizing or anti-aging mask on face and neck, preferably after exfoliating the skin. You can make your own moisturizing mask, check out our posts for avocado or pumpkin mask.

6-Do NOT pick at existing blemishes. I know its hard but when you pick at or pop a pimple, you are spreading the bacteria from that onto the rest of your face. When a blemish pops up dab on a little tea tree oil, or lavender essential oil. They are both are anti-inflammatory and anti-bacterial. Lavender is especially great to use because it also calms the skin reducing redness. If by chance you had picked at a blemish, apply neosporin to irritated skin. Neosporin will kill bacteria and help it heel quicker and lessen the chance of it leaving a scar.


7- Sunscreen, sunscreen, sunscreen! Wearing sunscreen daily will help prevent further damage.


Have a complexion question? Message me about it!


Looking for more help with your skin? Check out the products Sodee Naturals has to offer. Use the code: shwin when you check out and you will save 10% off your order.

Saturday, May 21, 2011

Lofty Lou Giveaway!

*Giveaway is now closed*


We are simply tickled to introduce you to our next sponsor! 
The lovely shop called Lofty Lou. 

This is Jody, she is the lovely and talented lady behind Lofty Lou. And she blogs over at Stitch to my lou. Her shop is full of lovely hair pieces like these:

Rosette and butterfly clip Don't you just love the whimsy of that butterfly?

You will also find these bright colored Peonies in orange...

They also come in lovely red

Her shop is loaded with goodies, it was hard to narrow it down to just a few. I also have some great news for all the Shwin&Shwin readers! She is offering one lucky winner a $15 gift card to her shop plus free shipping!

Do you want to enter to win?
Mandatory Entry:(please leave your email so I can contact the winner)
Check out lofty Lou's shop then come back here and leave a comment with what you pick if you won.

Extra entry:(leave a separate entry for each)


Photobucket

*Click on the stitch to my lou button (above) and follow her blog
*Blog, tweet or Facebook about the giveaway. 

Giveaway ends Friday May 27th at 11:59 P.M (MST) 

Also since Jody is super sweet she is also offering a special to all of our readers. 20% off all orders from now until June 4th! Sweet discount!
 Just enter BE LOFTY at checkout! 
Good luck!
*Giveaway is now closed*

Friday, May 20, 2011

Little Man Bow-tie Onsie

 Next up in the go-to boy gift is the Little man Bow-tie onsie. I live a little man with some style, and what says style more than a little bow tie? Since it is attached to the onsie there is nothing to go around the neck of your little one, also no need to wear a formal shirt. This can be made for any age, but I can't resist it for a baby. Also I have a free downloadable pattern for you today so making your bow tie could not be easier!


 To get started Download the pattern HERE

Then cut out the pieces as shown. I did this one with two different colors, but you can do it all the same. Mix it up however you like.

 Start by folding the bottom layer piece in half and sew along the top and side.

 Then turn the piece right side out and serge or zig zag stitch the raw edge.

 Then serge or zig-zag stitch the sides of the upper layer.

 Then fold the piece right sides together and sew along the long edge.

 Then turn it right side out and with the seam in the middle, turn the edges in and sew them closed.

 Then line the two bottom layer pieces up together.

 Lay the upper piece on top centering it over the bottom layer.
 Then sew a basting stitch to attach the layers together as well as gathering the middle.
 Then turn the two sides of the middle piece in ward and wrap it around the gathered part of the bow.
 Then sew the middle down to the middle of the onsie.

Then you are done, now there is no excuse not to have a well dressed little man! Go ahead make a dozen! 

Want the rest of the go-to baby boy gift?
Check out the shoes HERE 
The pants will come next week.

We have a Winner!!

The winner of the Birdy Boots giveaway is....
 #39! Who is Mamma of 7!! 

Congratulations!! We shall be in touch!

Thursday, May 19, 2011

Little Man Shoes


 A friend of ours had a baby boy, which gave me the excuse I wanted to make a baby boy gift set. You may remember how my go to girl set is the Abbey Dress and Pleated Mary Janes. Well my go to boy gift starts with a pair of the little man shoes. I released the pattern and shared the tutorial a few months back. However if you missed it here it is again. 
Download pattern HERE

Follow tutorial HERE

 This pair I made with some sweet seer sucker and are lined with felt. Then I added two buttons just for looks but a functional snap.

They go perfectly to complete the go-to boy gift. The other pieces will be shared later :) 
Enjoy!
Wednesday, May 18, 2011

Garden Bloom Skirt


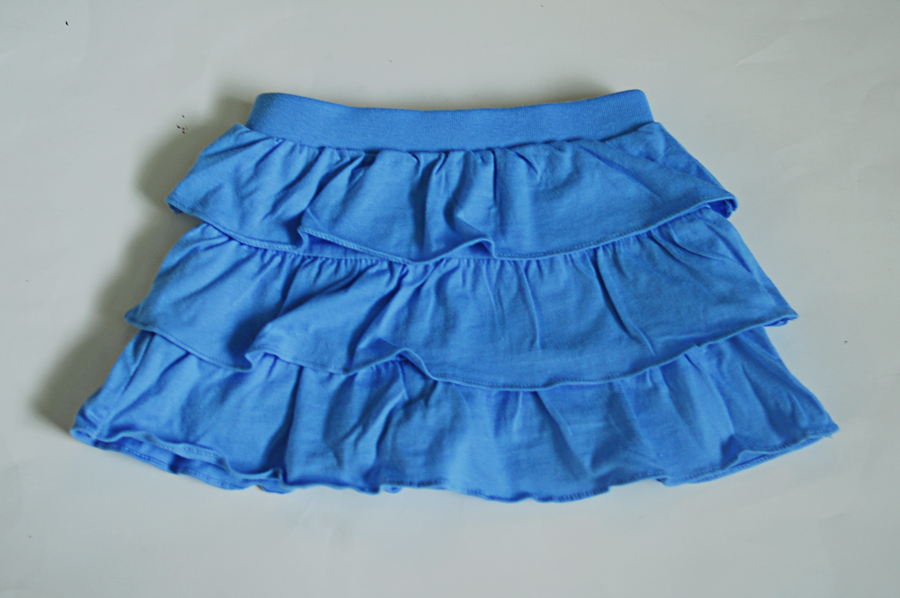
 It's that time of year again the time the sun shines in through our window beckoning us to come out and play. I find myself spending my whole day outside with the kids and when very little time left for crafting, so I am all about the quick projects. Like this one today. Starting with a basic ruffle skirt I picked up at Walmart for $3.50 I simply added a little tie belt and I had a new little skirt.
 Summer can be enjoyed in a comfortable jersey skirt with a lovely little garden bloom belt. Want to make one yourself? It's really easy, and has a lot of different possibilities.


 Here is the skirt I started with. Basic comfy jersey skirt with layers of ruffles and hidden shorts underneath (a huge bonus for a little girl who is always lifting her skirt.)
 Then I cut a small little shape out of felt to be the base of the belt. 
 Then I cut out some long jersey strips and sewed them to the sides of the base piece. They should be long enough to tie around the waist.
 Next I made two types of flowers I made white ones out of jersey following THIS tutorial. Then I made felt flowers out of different colors using THIS tutorial. Then I added a few leafs and beads for details. I sewed them all down to the base piece and then I cut around the flowers to remove the extra felt from the edges.
(sorry for such a blurry picture ekk!)

 So now you have a belt. Which could actually be a headband... (and there maybe one of those coming up :) You could leave this loose and then it could be worn with any outfit, for an adult or child. 
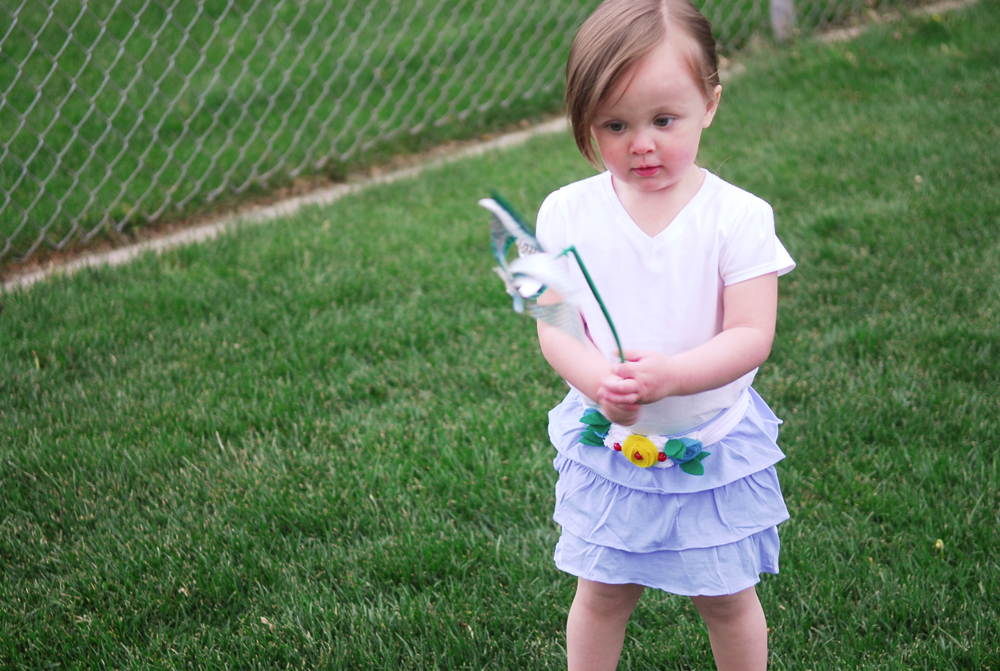
 However I tacked it down to the skirt since little ones are always playing around and the last thing I wanted to worry about was the belt coming loose or falling off stopping her from playing freely so I tacked it down to secure it.

 There you have it a Garden Bloom skirt.

 I love the pop of color it adds and of course the floral aspect.
 I also love the big floppy bow in the back that flaps around as she runs.