Wednesday, August 31, 2011

Sewing 101: Flat Collars

Moving right along with the sewing 101 series. It is time to move on to collars. Today and tomorrow we will go over collars. Drafting them and then sewing them. Today we are going to start with the flat collar. Also known as the Peter Pan collar. It is a pretty basic collar (since believe me there are a lot of complicated collars out there) So let's start easy with the flat collar which means it lays flat right out of the neckline. 
 To start the drafting of the collar you will need a front and back bodice. (need help with the drafting check here)
 Next tape the shoulders together. Make sure you tape them how you would sew them including a seam allowance. (you could also draft the collar from the sewn bodice piece if you want to sew it first)
 Then you are going to trace the neckline of the bodice. I mark which is the front and which is the back.
 Next (excuse the amazingly wobbly line ha!) You are going to sketch the collar. You want the straight edge of the back to use to set your collar width. I choose 1.5 inches for this collar but what you choose is up to you. Then you want the width to stay the same so I follow the neckline curve and mark dots 1.5 inches out and then connect the dots. When you get to the front you want to make a curve that extends out past the mark of the front.
 Next you want to outline your seam allowance around the whole collar. (unless you don't want a split in back in which you can cut this out on the fold of the straight line in back.)
 Once you cut out your collar (4 if you are doing a split collar and two if you are doing a one piece collar) Cut off the seam allowance from the pattern and use that for the interfacing pattern. Trust me when it comes to collars you don't want to skip on the interfacing or they will loose their shape and look all wonky. (not good) Then iron the interfacing on to the wrong side of the collar piece. (only one piece of the collar needs the interfacing)
 Then take two of them and sew them right sides together. Next I use pinking shears to trim the curve since it is easy and fast and helps the curve. Don't sew along the neckline you are only sewing the outside edge.
 Now with it right side out you have 2 collars. (So they each should have one piece of interfacing ironed on to the inside)
 Then place your collar along the neckline of the bodice. (your bodice and facing should be sewn at the shoulders)
 Next you will put your facing along the edge as well. (need help with facing? check here) Sew along the neckline.
Then turn your facing to the inside and there you have a lovely flat collar.
Not to bad right?

What will you be putting a collar on first?

Tuesday, August 30, 2011

Sewing 101: Facing

Almost all of the tutorials I share use some form of facing. However if you are new to sewing, or new to self drafting maybe you find yourself a little lost when it comes to facing. Honestly it was one of the things I always wanted to skip when I was first learning to sew, and interfacing? Forget it! Who needs it I would ask. Well let me tell you I have long abandoned that foolish thinking and have come to realize how easy and necessary both facing and interfacing can be. Hopefully today's sewing lesson will clear the air for you as well. 

 Let's start by the drafting of facing. I am going to show you neck facing and combination facing today. (with a few twists) Facing is used other places as well but the basic drafting is the same idea for a neckline as it is for a waistline.
Start with your bodice piece. (need help drafting one? check the drafting lesson)

 From your bodice pattern you will simply follow the curve making a new one about two inches in from the edge. Then after you cut out your bodice piece cut along the dotted line and you have the pattern piece for neck facing. (simple right?)
 Now let's talk combination facing. Combination facing is anytime you are using one piece of facing to cover both the neck and arm opening. You would do this if say you wanted the top to be sleeveless, this helps finish the edge. (I used combination facing in this dress)
 Here are a few "twists" on facing. Say you have a slit or opening partway down the bodice (something I do often for a larger head opening) On the top you will see regular combination facing and on the bottom you will see what it looks like if you make the facing come down longer to allow for the slit. (you could also make it a full facing and make the facing the same as the bodice)
 Here we have neck facing on top and neck facing with room for a slit or as I like to do sometimes have a fun flap to put a sewing label or tag.
 Handling your facing is just like you would handle your bodice. Start by sewing together at the shoulders. What ever you do with the bodice do with the facing. Then to face the neck opening (hence the term facing) Sew the facing and bodice right sides together along neck opening. Then turn it around to the inside.
 One method of securing the facing to the bodice is to topstitch the edge. Here I did a decorative stitch along the edge. For the combination piece you will then fold under the facing and the bodice edge so the raw edges of both are turned inward. Then top stitch along the edge.
 Lastly one way of finishing the edge is to use pinking shears and trim the edges. This helps the fabric to fray less.

 There you have a nice finished and faced neckline and sleeve opening.
 Next let's talk interfacing. Like I say I used to skip it thinking it was not important and just a waste of time. (much to my mom's dismay I am sure) Then I learned there are only a few slight differences in how you sew that make huge differences in how something turns out. Interfacing for example helps to give and keep shape to a neckline. Something that could other wise throw off the whole garment. so take the time to cut out and iron on some interfacing... (there is of course sew on interfacing to, but iron on is just so easy)
 There are also a number of ways to finish the edge of your facing. Like the pinking shears shown above, or you can turn under the edge and top stitch in place like this picture shows... (ignore the curve where my machine and I had a little squabble)
 Another way and one of my favorite ways is to bind the edge with bias tape. Bias tape just makes everything look cute. To do this simply sandwich the facing in between the fold of the bias tape and top stitch around the edge.
 Now let's say you want to secure the facing but you don't want the top stitch to show on the outside. After you sew the facing to the bodice, clip those curves. you have to clip (the little triangles cut into the edge) if you want this to lay right. Then press the seam so it is on the interfacing. Top stitch along the seam.
 You will notice when you turn it around the stitching is on the facing but not on the bodice.
 While that stitching will secure the facing for the most part you will also want to take a thread and needle and just tack the facing in place at the shoulder seam.
 Then you are done you have a nice finished neckline and no top stitching in sight.
Well except on the facing of course. And who can pass up some great facing with a cute little place to put your tag or sewing label?

Well I guess it is time to fall in love with the inside of your garment as well as the outside. Don't you just love what a little facing can do?


Monday, August 29, 2011

Sewing 101: Drafting

We are continuing the Sewing 101 series. One of the questions we get asked a lot is about pattern drafting. Yes I draft all of my own patterns. No I don't have a problem with sewing from a pattern. My only problem with most commercial patterns is they just don't fit. They always seem boxy. So I started by altering patterns to fit my kids then I realized that making my own patterns would be so much easier. It also allows your creativity to go wild. If you can dream it you can draft it. However since this is sewing 101, I am going to just share the very basic method I use and that is tracing. There are really only a few things you have to know in order to make a basic top or pants. (the two things we will discuss today)So let's start with a top. 

 I like to find a basic tee that fits my kids well. As they outgrow it I simply buy another one. Then I keep that tee with my sewing supplies to draft any pattern I want with. To start the drafting turn the top inside out and smooth it out.

 A key thing to remember is if you are drafting from a tee shirt, they stretch, so if you are making a pattern for a top without stretch you may want to draft the pattern using a top without stretch.
 Next tuck the sleeve of the shirt inside the top. Make sure the sleeve seam is fully exposed.
 Next fold the top down the middle. I do this so the pattern is drafted on the fold and that way your bodice will be even on both sides.
 Then Line the fold up along the edge of the paper. (that way you get a nice straight edge) Then with all the seams exposed and laying flat trace around the edge. (add some room for the seam allowance)
 You also want to be sure and add extra length where you will hem, like the bottom of the top.
 There you have a bodice piece ready to cut out on a fold.
 Let's move on to the sleeve. There are a million different ways to make a sleeve and there are a million different sleeves. We will go over more sleeve types later in the series but to I am just going to show you how you trace a sleeve. Line up the fold of the sleeve (at the shoulder) and the edge of the paper. Then trace the edge of the sleeve (add a little length for hemming)
 Then flip the shirt over so it is covering the sleeve and so the sleeve seam is exposed. then trace the curve of the seam.
 There you have a sleeve pattern piece. Cut on the fold just as you would the bodice piece. There you have the basic top drafted from a top you already own.
Next let's move on to the ever tricky pant. No need to be afraid of the pant it is just as easy as a top with just a few more key things to remember. Start the same way turning the pants inside out so the seams are exposed. Then with either the front or back showing (you will do them separately) Line up the straight edge of the jeans with the edge of the paper. Then you will trace the seams. Make sure they are all laying flat and exposed.
Also add a seam allowance as you go. Do the same thing once for the back and once for the front.
There are a couple key things to realize with pants. The back will always have a larger curve and rise from the back curve. This is so the back can go over the rear. You will also notice that the front curves up from the rise and the back curves down from the rise. Why? This is so the back of the pants are higher than the front. (as they should be) There you have it very basic pants and top drafting.

We will be covering other drafting techniques as the series continues, but this covered the basics.

Saturday, August 27, 2011

Oh Beatles...

Print available HERE

You may have noticed from a few posts over time that we are pretty serious Beatles Fans.
Posts HERE, HERE, HERE, HERE, HERE, and HERE

So for a little fun this weekend (we love fun!) We put together a little Beatles Survey about. Want to take it?

CLICK HERE

Enjoy! And have a Great Weekend!

Project Runway: Off the Track

Project runway this week was weird. They have done "athletic" challenges in the past and I always think they are odd. The designers all seem lost on these challenges. This one in particular Heidi gave some odd instructions, I was confused with what they were supposed to make of design. I think they were trying to "not hold them back" but then in judging they always want something ver specific. It was just odd. However I agreed with the judges for the most part when it came to the Judging. 
Also talk about a dull week... I want to go to mood and throw away all the grey fabric, dye and trim. I mean I love grey but enough already...
This week was a team challenge (with lots of drama) and there were two winners (three if you count the return of Joshua a win) The wins went to the team leaders which was likely not fair...(in my opinion)
So let's get down to it...

 Winner: Joshua got a win for this dress. I was kind of shocked. SO Joshua caused a lot of drama on his team, problems and did not himself make or design something the judges liked. Anya designed this dress (shocker I know all of her designs look like this) Becky sewed the dress (shocker right? I love Anya but can she sew a garment?) Joshua got the win... hmmm I am just not sure why...
 Winner: Viktor won for this dress and really and truly I love this look. I don't think it is terribly fashion forward, or new or exciting. However I love the dress the jacket the whole look and I would totally wear this. He was the team lead, and his whole team did pretty well. So I say it is a fair win.
 Loser: Sweet Danielle went home this week. I think she is a talented seamstress but I think we saw all the design we were going to get from her. However hers was not the worst and so I do think she could have made it through to the next week.

The rest of them:

 Here is team Anthony Ryan. I love Anthony Ryan and I really like Laura. (although I am starting to wonder why) Call me crazy but I really liked Laura's top. The cross in back was cute. But boy howdy did the judges hate it. The shorts were a hot mess, and the vest just looks sad to me, but I think Heidi threw them off when she came to visit... who knows. Then there is the train wreck that is Anthony Ryan's garment. I think he had something cool going with the geek goddess like drape and then Heidi didn't like what she saw and he gave up or something since this thing was just ugly. Lastly Bert. Oh Bert. I used to like you. Then you became all negative, and I don't like your designs and I totally agree that she looks like a cocktail waitress on the way to work and she took comfort over style on the shoes. just bad.
 Team Bryce: This team had some issues. Nothing major in my mind but all a little dull. The judges loved Bryce's dress. It's fine, I like the shape but the darts are kind of weirs and pulling funny on the model. Danielle's look was just boring, and ordinary but the judges ripped her a new one that's for sure. Then there is Kimberly's look. For a girl who can make a killer pant the shorts were pretty bad. The jacket was cute but Danielle made that (yeah the girl who went home made the cute jacket) I guess I found the whole collection kind of boring...
 Team Viktor: Besides the fact that the whole collection is grey and that is a bit more than boring. I loved this one on the runway. (except the middle skirt) Viktor's dress and jacket were great. Oliver did the skirt and shirt, which looks just as boring and frumpy as everything he has made so far, why the judges seem to like him is beyond me. Then the return of Joshua when Cecilia dropped out brought forth this outfit. I LOVE the top. I know it's a little strange maybe but I would totally wear this. I love the neckline, the holster look, the wrinkle to the tee. The only thing I don't love is the fit of the pant they need to tapper more or come longer right now they look like high water pants, and no one wants that.
Team Joshua: Anya's dress won Joshua a challenge, it's cute, I like the dress and I would wear this dress but I do feel like she has done this look over and over again. Joshua did the middle look. It does look athletic but the vest is weird, and since he didn't make the print which is the only cool thing there, I think he got more credit then he deserved. Becky did this last look. That top is pretty bad. The skirt is pretty bad. That's about all I have to say here. I think Becky has skills to design and sew, and I think it was a bit of a shame she was treated so rudely by Joshua. At least he apologized.

So what are your thoughts? Do you like the return of Joshua? Did you thing the double win was fair? Are you getting sick of the grey as well?

Friday, August 26, 2011

Eleanor Rigby Top

 Before Abbey was an Abbey she nearly became an Eleanor. You see we like the Beatles... (ok we love the Beatles) We wanted to give our kids names that meant something to us, so we choose Beatles names. We didn't discover the gender of our little miss until she was securely in our arms so we went to the hospital with a list a boy and girl names figuring we would decide which fit when we saw her face. She was almost an Eleanor. It's ironic actually because our little Abbey is the shyest little gal I know, so maybe Eleanor Rigby would have suited her just fine. She prefers to play by herself and be by herself and breaks down crying in a hysteria if a stranger so much as glances her way, it's 10 times worse if they dare try to greet her. Tell me, do you have shy kids? Kids that shy? Tell me they outgrow it and it's just a phase... Anyway back to the top of the day. I appropriately named it Eleanor Rigby for our shy little one... (although maybe naming it wallflower would have been more hopeful)
 I added pockets to a relatively simple top so she could store her treasures and it added a little detail.
 It also takes advantage of some smocking from the lesson earlier this week.

So shall we get started?

 Now before we laugh and make fun of my drawing skills here, let me just say a while back my dear sweet husband bought me a drawing tablet for the computer, it take some getting used to (clearly) so I am trying to force myself to use it more often. Sketching out the pattern pieces I just thought would be the easiest way for you to see them, bad sketches and all. (ok feel free to laugh now) So here is the deal.
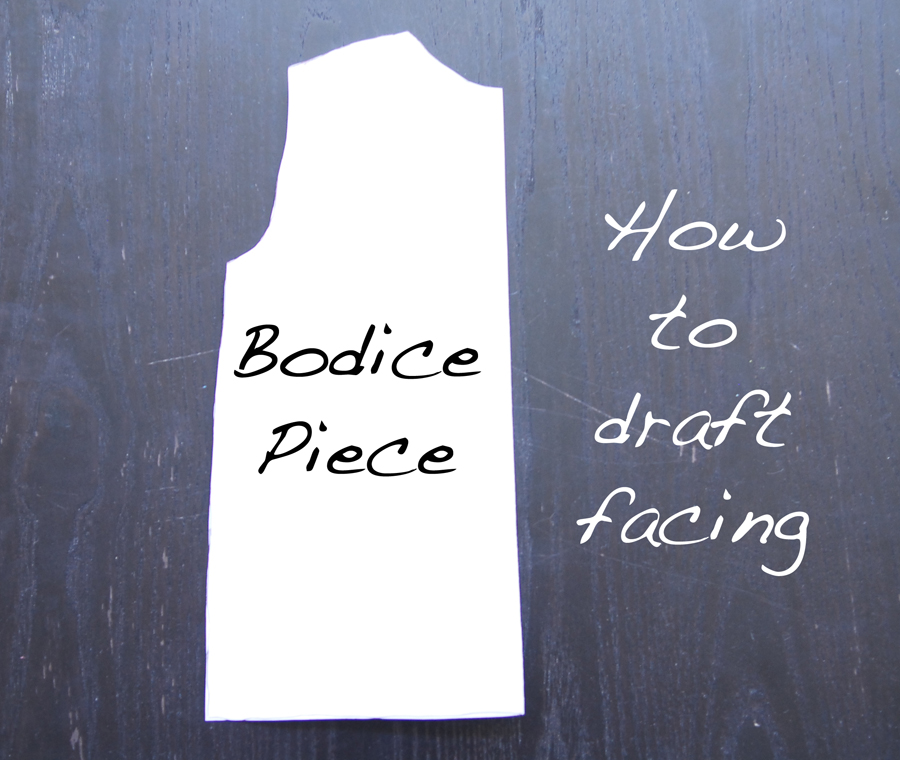
The front of the top is broken into 2 pieces one bodice piece that will be smocked and one skirt piece that will have the pockets. The lines show the slits for the pockets.
The back I made all one piece. Then I cut a slit in the top to create a larger neck opening.
Then there is the sleeve which I did as a petal sleeve. (more on that later)
Lastly the pockets which is just a rectangle the length of which should be two times the desired depth of the pocket. (since the pocket is folded)
Other than that you will use facing for the bodice, front and back. For the front I did mine fully faced which means cutting two bodice pieces and for the back I only did a facing which you will see later.

 Ok so let's get down to it. The bodice is going to be smocked. Remember in smocking 101 how if you are going to smock then you have to allow for 2.5-3 times extra room. The easiest way to do this is to create a regular bodice piece (shown folded) and then cut out a second one adding several inches. (both shown folded)
 Then smock the top. I smocked the middle section only, using the honeycomb pattern. The best thing about smocking a plaid is the lines are already there for you I just used the cross points as my "dots" You can see how once it is smocked it is the same size as the regular bodice piece, which is now the facing.
 Now for the petal sleeve. I have made a petal sleeve a number of different ways, but lately this is what I do: Trace the curve of the arm opening. Then continue the curve up past the shoulder (that's what will overlap) then round down and come to a point at the arm pit. Is this the "right" way? Likely not, but it is the way I like to do them.
 Next for the back facing. I cut a curved piece that goes from shoulder to shoulder and is long enough to go an inch past the slit that is in back. Then be sure to cut the slit in the facing as well.
 Ok now for the sewing... before we start I changed the neckline when I was done, since I decided I didn't like it when it was on. So I am changing some of the instructions from what is shown... Start by sewing the facing pieces together at the shoulder seams. Then sew the bodice piece to the back piece at the shoulders. Then with right sides together sew the facing to the outer pieces by sewing around the entire neckline, including sewing around the slit in back.
 Then you will turn the facing around to the inside and simply tack by hand the facing in place at the shoulder seam. That will keep it secure. SO you can kindly ignore the piping and the top stitch which is a hot mess and was removed...
 Next let's tackle that front skirt piece. Start by sewing some piping to the bottom half of the slit. The flap of the piping should line up with the raw edge of the slit.
 Then take your pocket flap and sew right sides together along the same line you sewed the piping. The left pocket above is done and the pocket has been turned to the inside and the right pocket is showing how you sew it.
 This next part is really easy to do but hard to photograph. I promise it makes more sense as you do it. You want to take the other end of the pocket rectangle and flip it up so right sides are together with the top part of the slit.
 Then you will sew it together. Both seams now should be on the back side or inside of the top.
 Then fold those pocket flaps to the inside and you should have pockets that go into the slit. This is where I take a needle and thread and hand tack the corner of the piping into the corner of the slit.
 Then in the back sew both sides of the pockets.
 Then with right sides together sew the skirt piece to the front bodice piece.
 Now for the sleeves. You should have 8 petals. 4 for each side. Sew two right sides together. Then turn it right side out.
 WIth right sides together secure the petals in place matching them at the end of the arm opening and overlapping them in the middle. Then sew them in place. (you can once again ignore the piping at the neck)
 Then with right sides together sew along the sides.
 Lastly add a button and loop to the back and hem the bottom and you are all done, unless you are like me and decide you hate the piping and cut it all out and re-do the neckline...
 Either way your little miss (or big miss) has a new and stylish top. Which can be worn with a belt if you are a belt lover like Abbey and thinks a belt should be worn with PJ's and even swimsuits...
 The smocking detail adds a little something to the top, which is fun.
 And the nice deep pockets are perfect for little treasures or gummy bears to bribe a certain little lady to get her picture taken...